NVECTA supports multiple users within a single account, so you can bring your whole team onto one workspace without sharing a single login. With role-based access control, you decide exactly what each person can see and do, and with PII masking you can take that a step further by hiding sensitive customer details from people who don't need them.
This guide walks through everything you need to manage access in your account: adding users, changing their roles and status, working with default and custom roles, and applying PII masking to protect personal data.
In this article
- Where to find Account Access
- Managing users
- Roles
- PII masking: protecting sensitive customer data
- Putting it together
Where to find Account Access
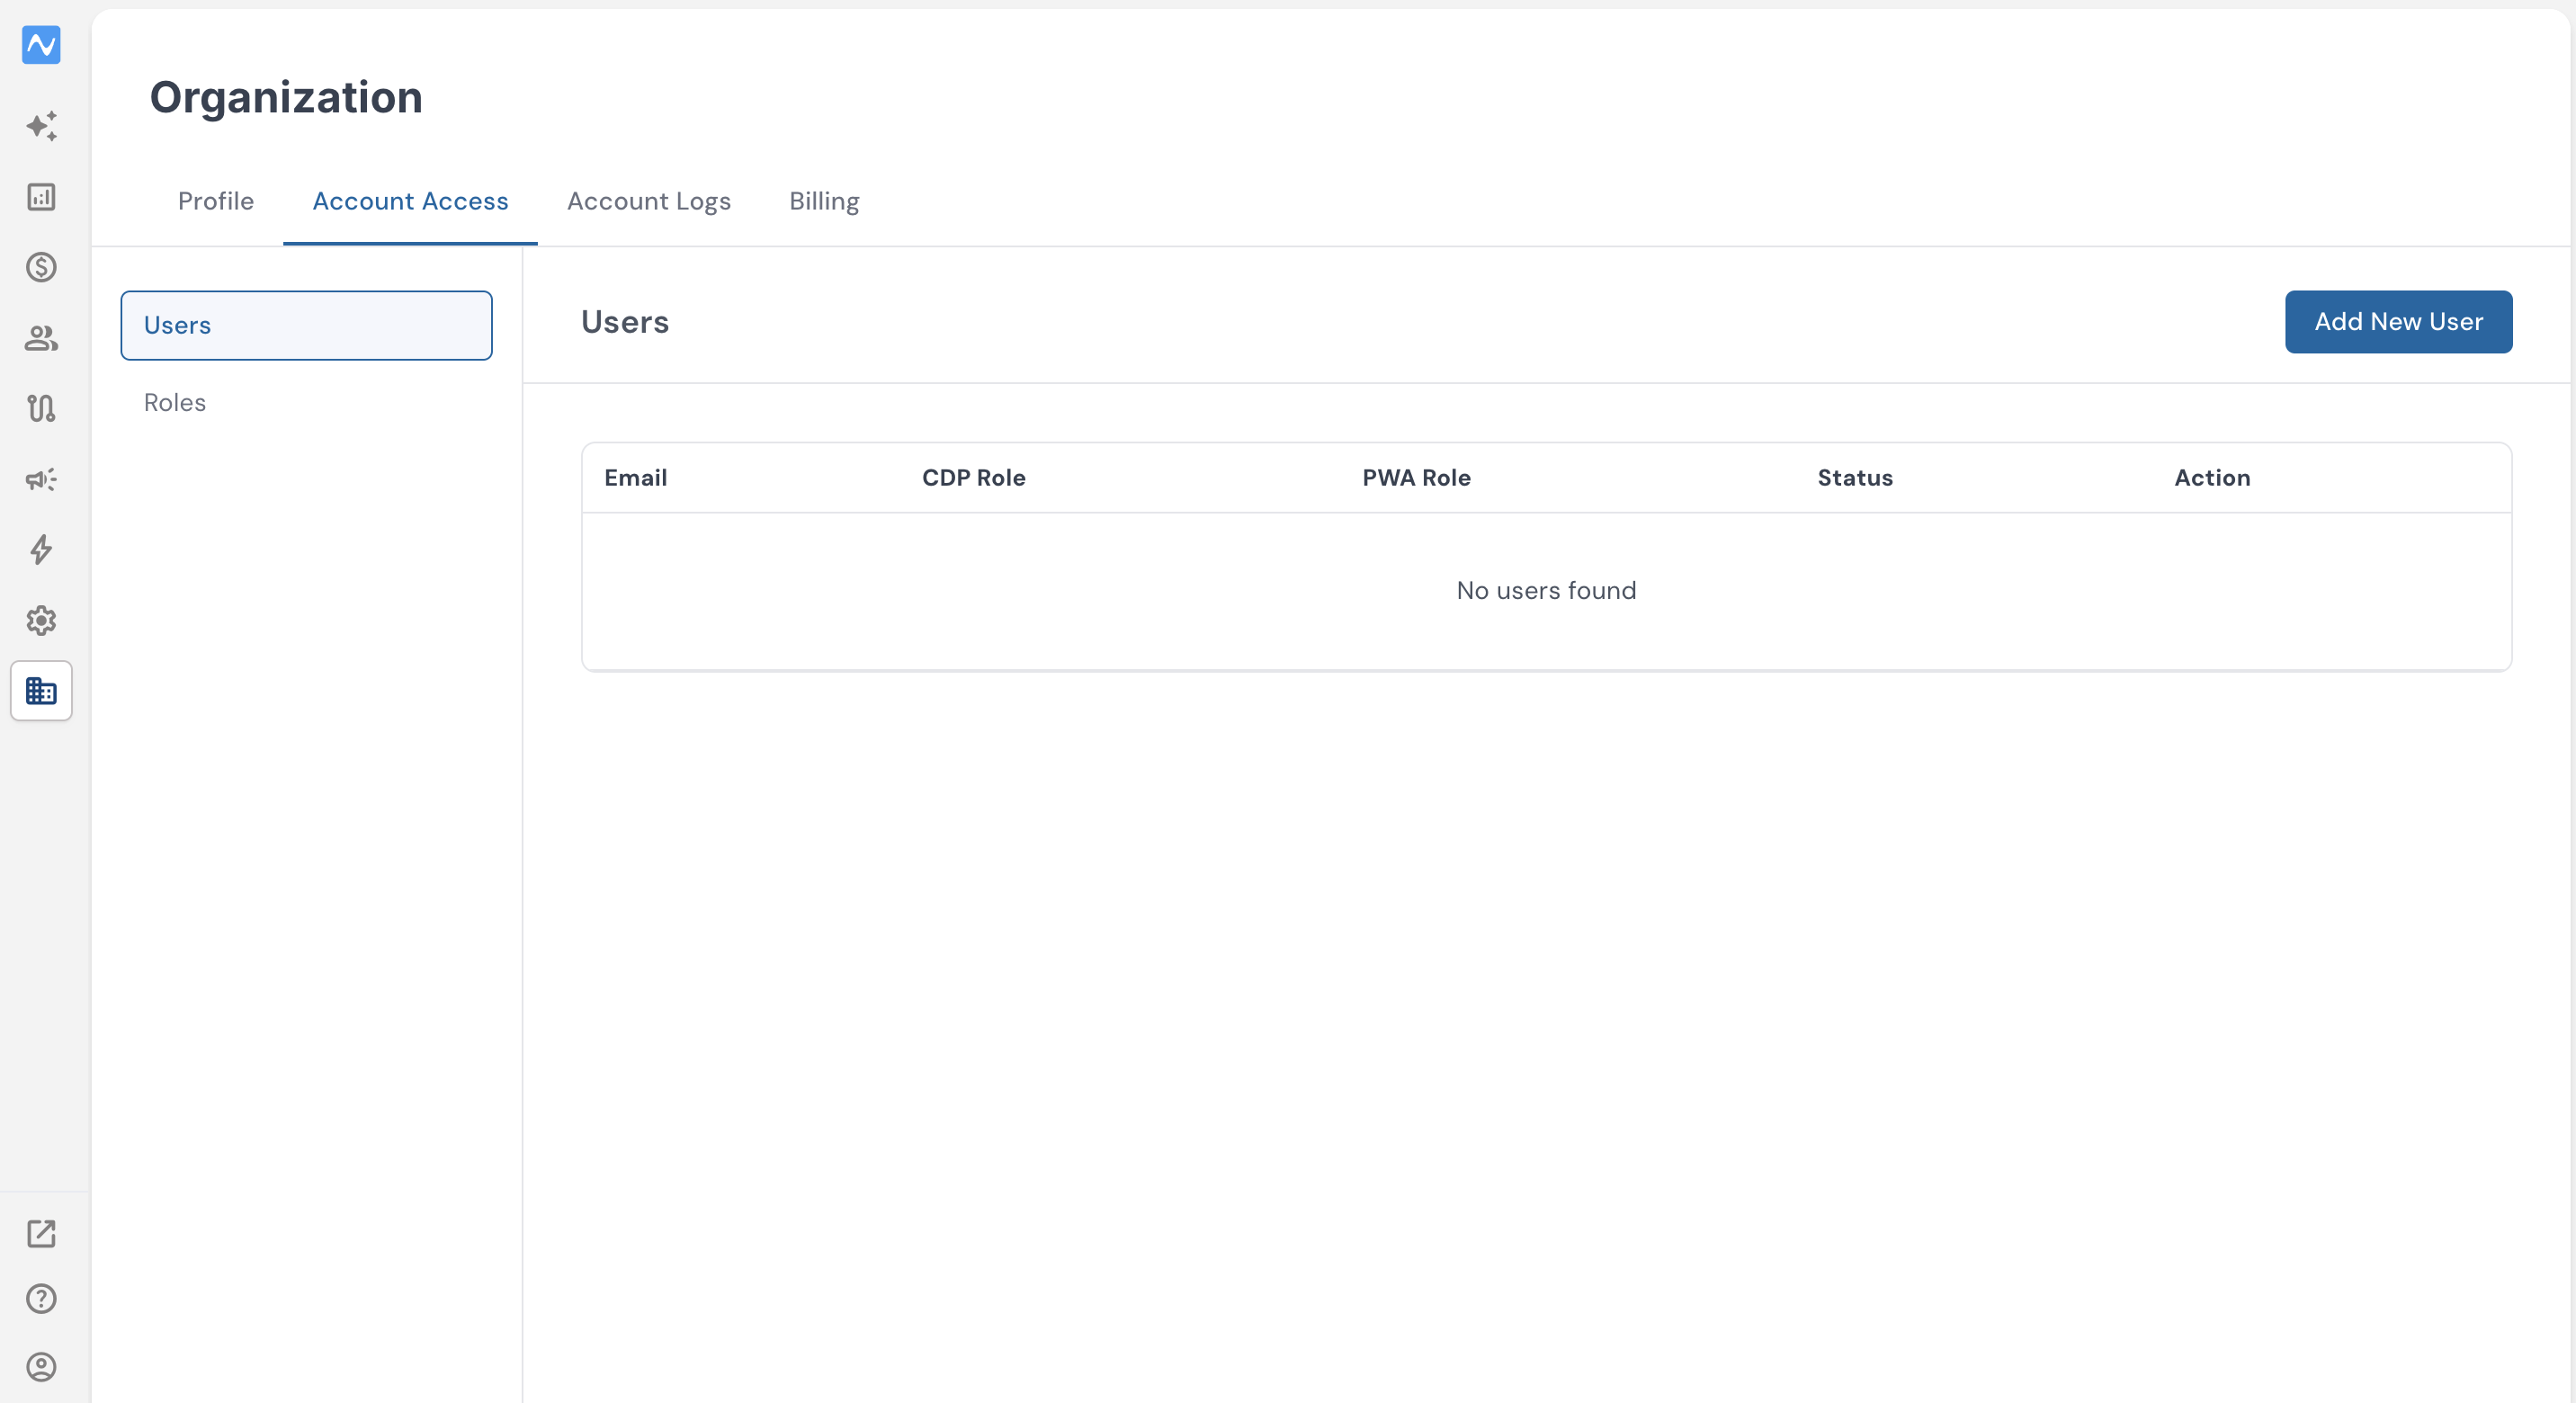
Everything described in this article lives in one place. From the NVECTA dashboard, go to Organisation> Account Access.
Account Access has two tabs:
- Users — where you invite people and manage their individual access and status.
- Roles — where you view default roles and build your own custom ones.
Managing users
Adding a new user
Open the Users tab and add a new user by entering their email address and selecting a role from the dropdown.
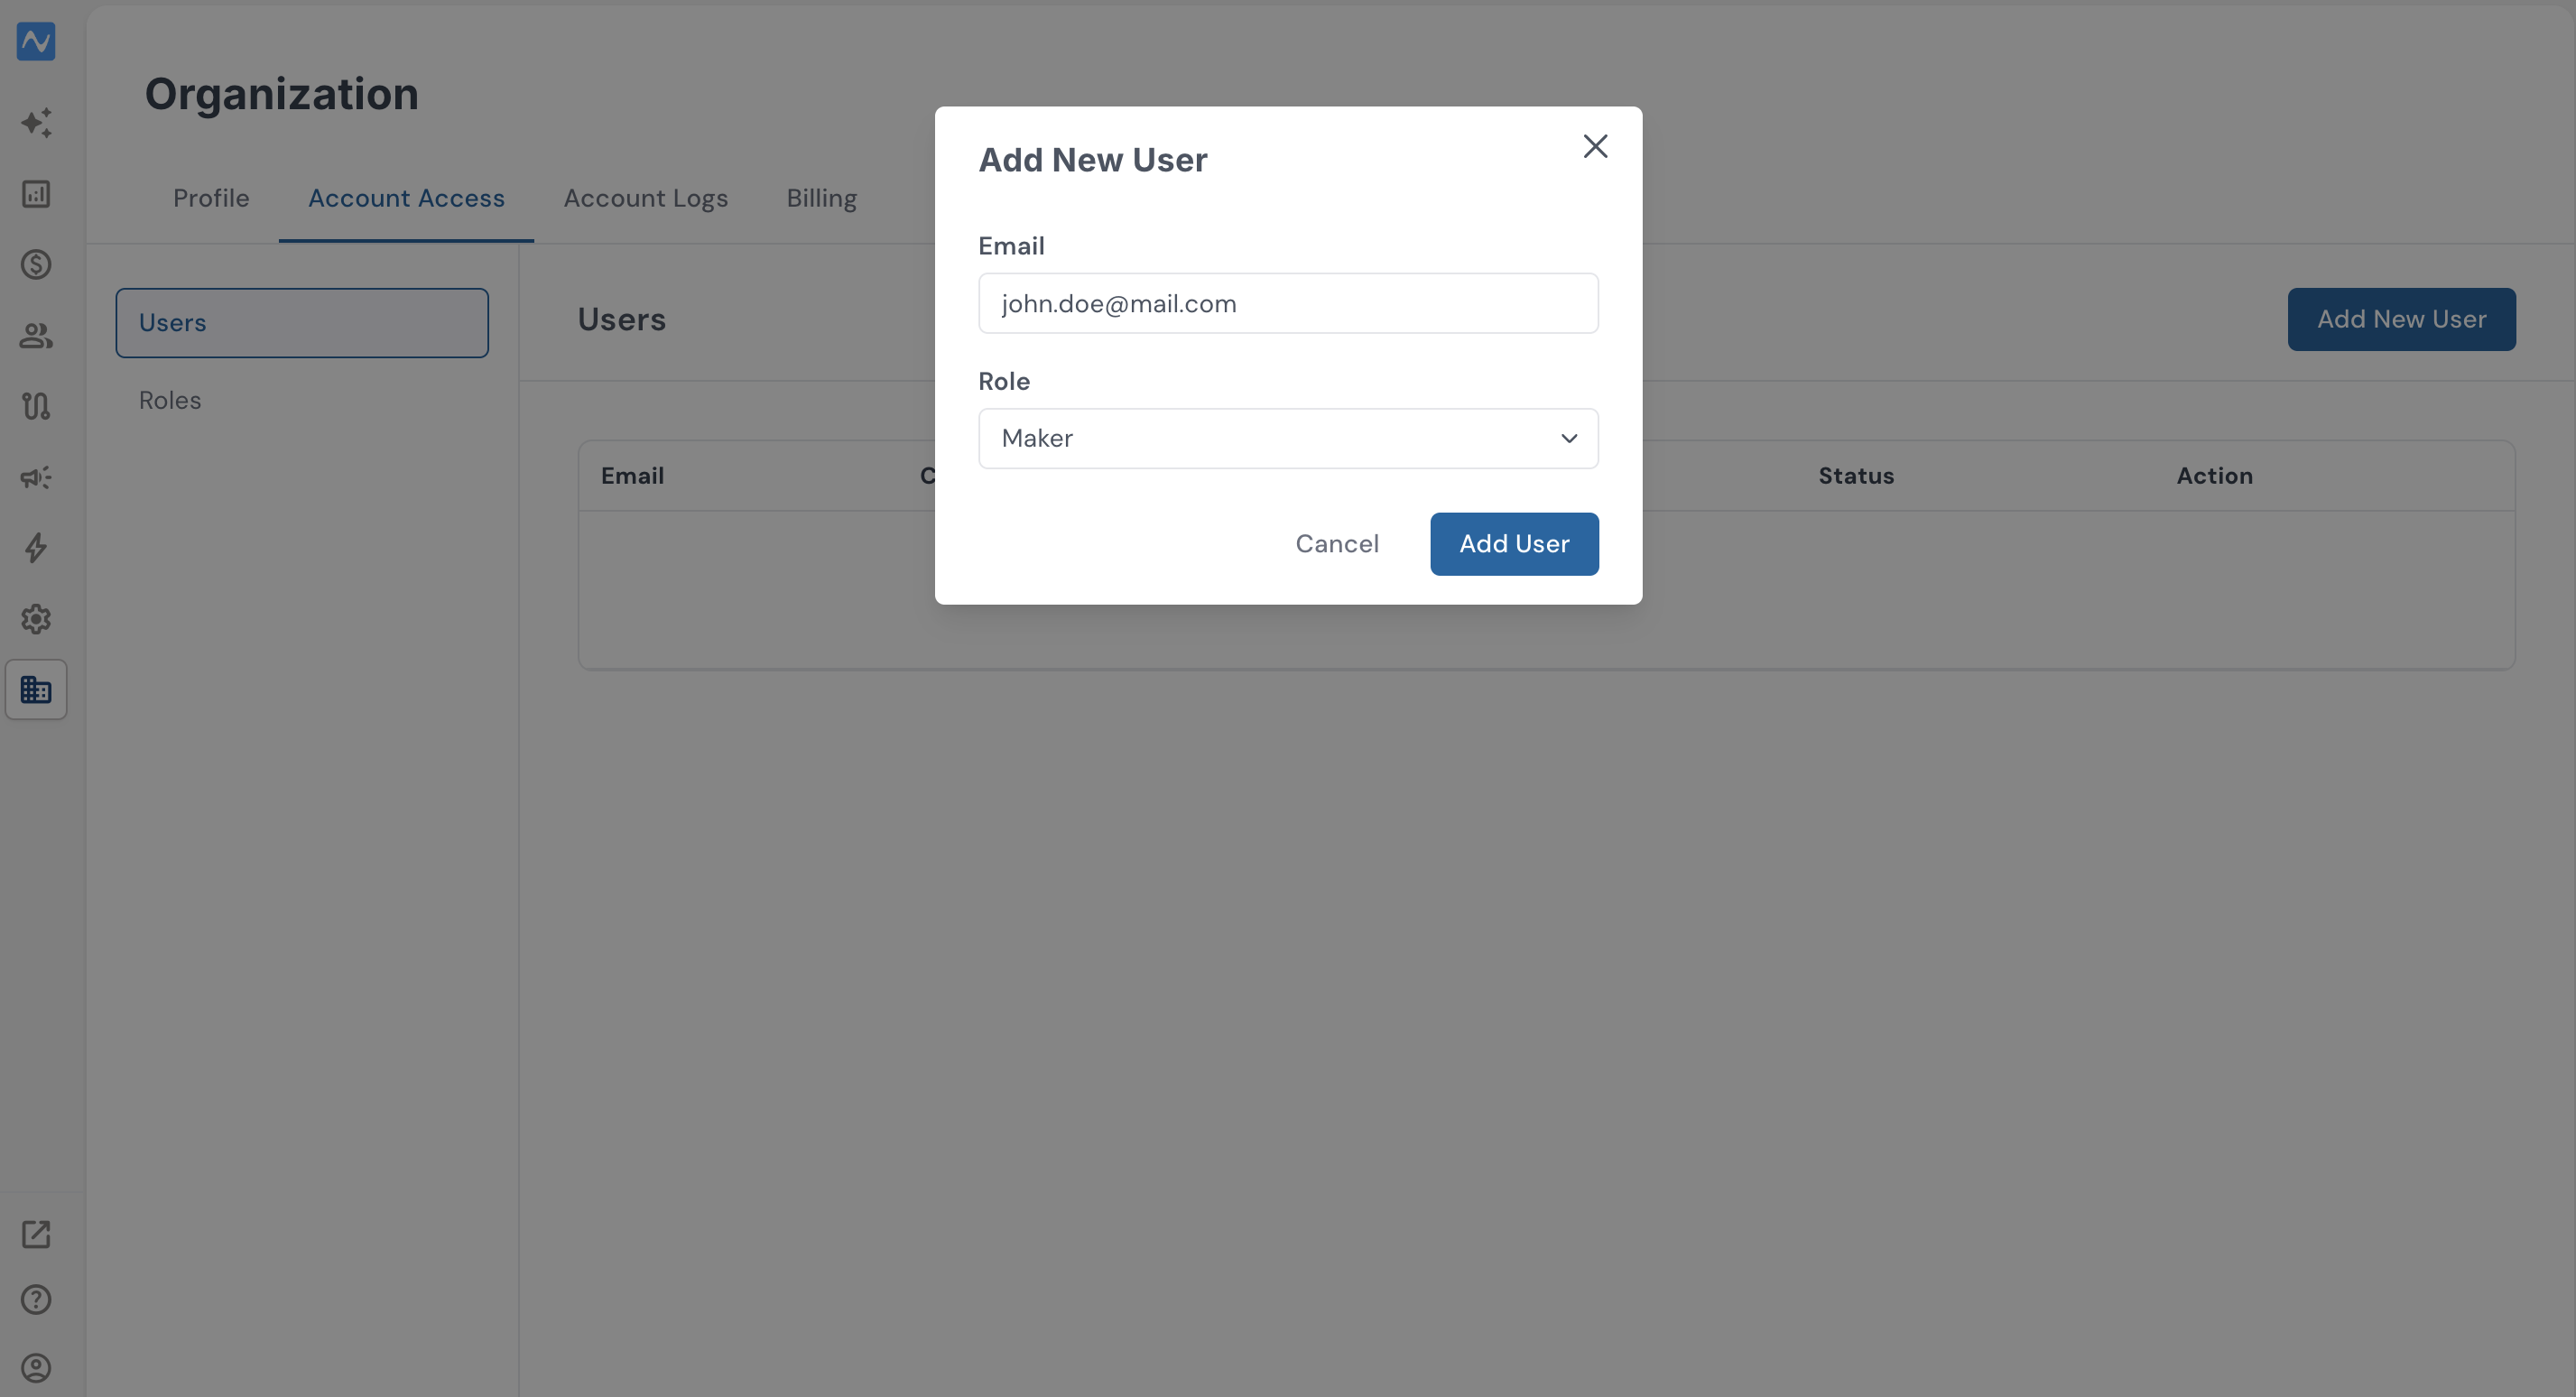
Once added, the new user appears in the panel along with their email address, assigned role, and status (Active or Inactive). The user also receives an email invitation, and the account access only becomes active once they accept it.
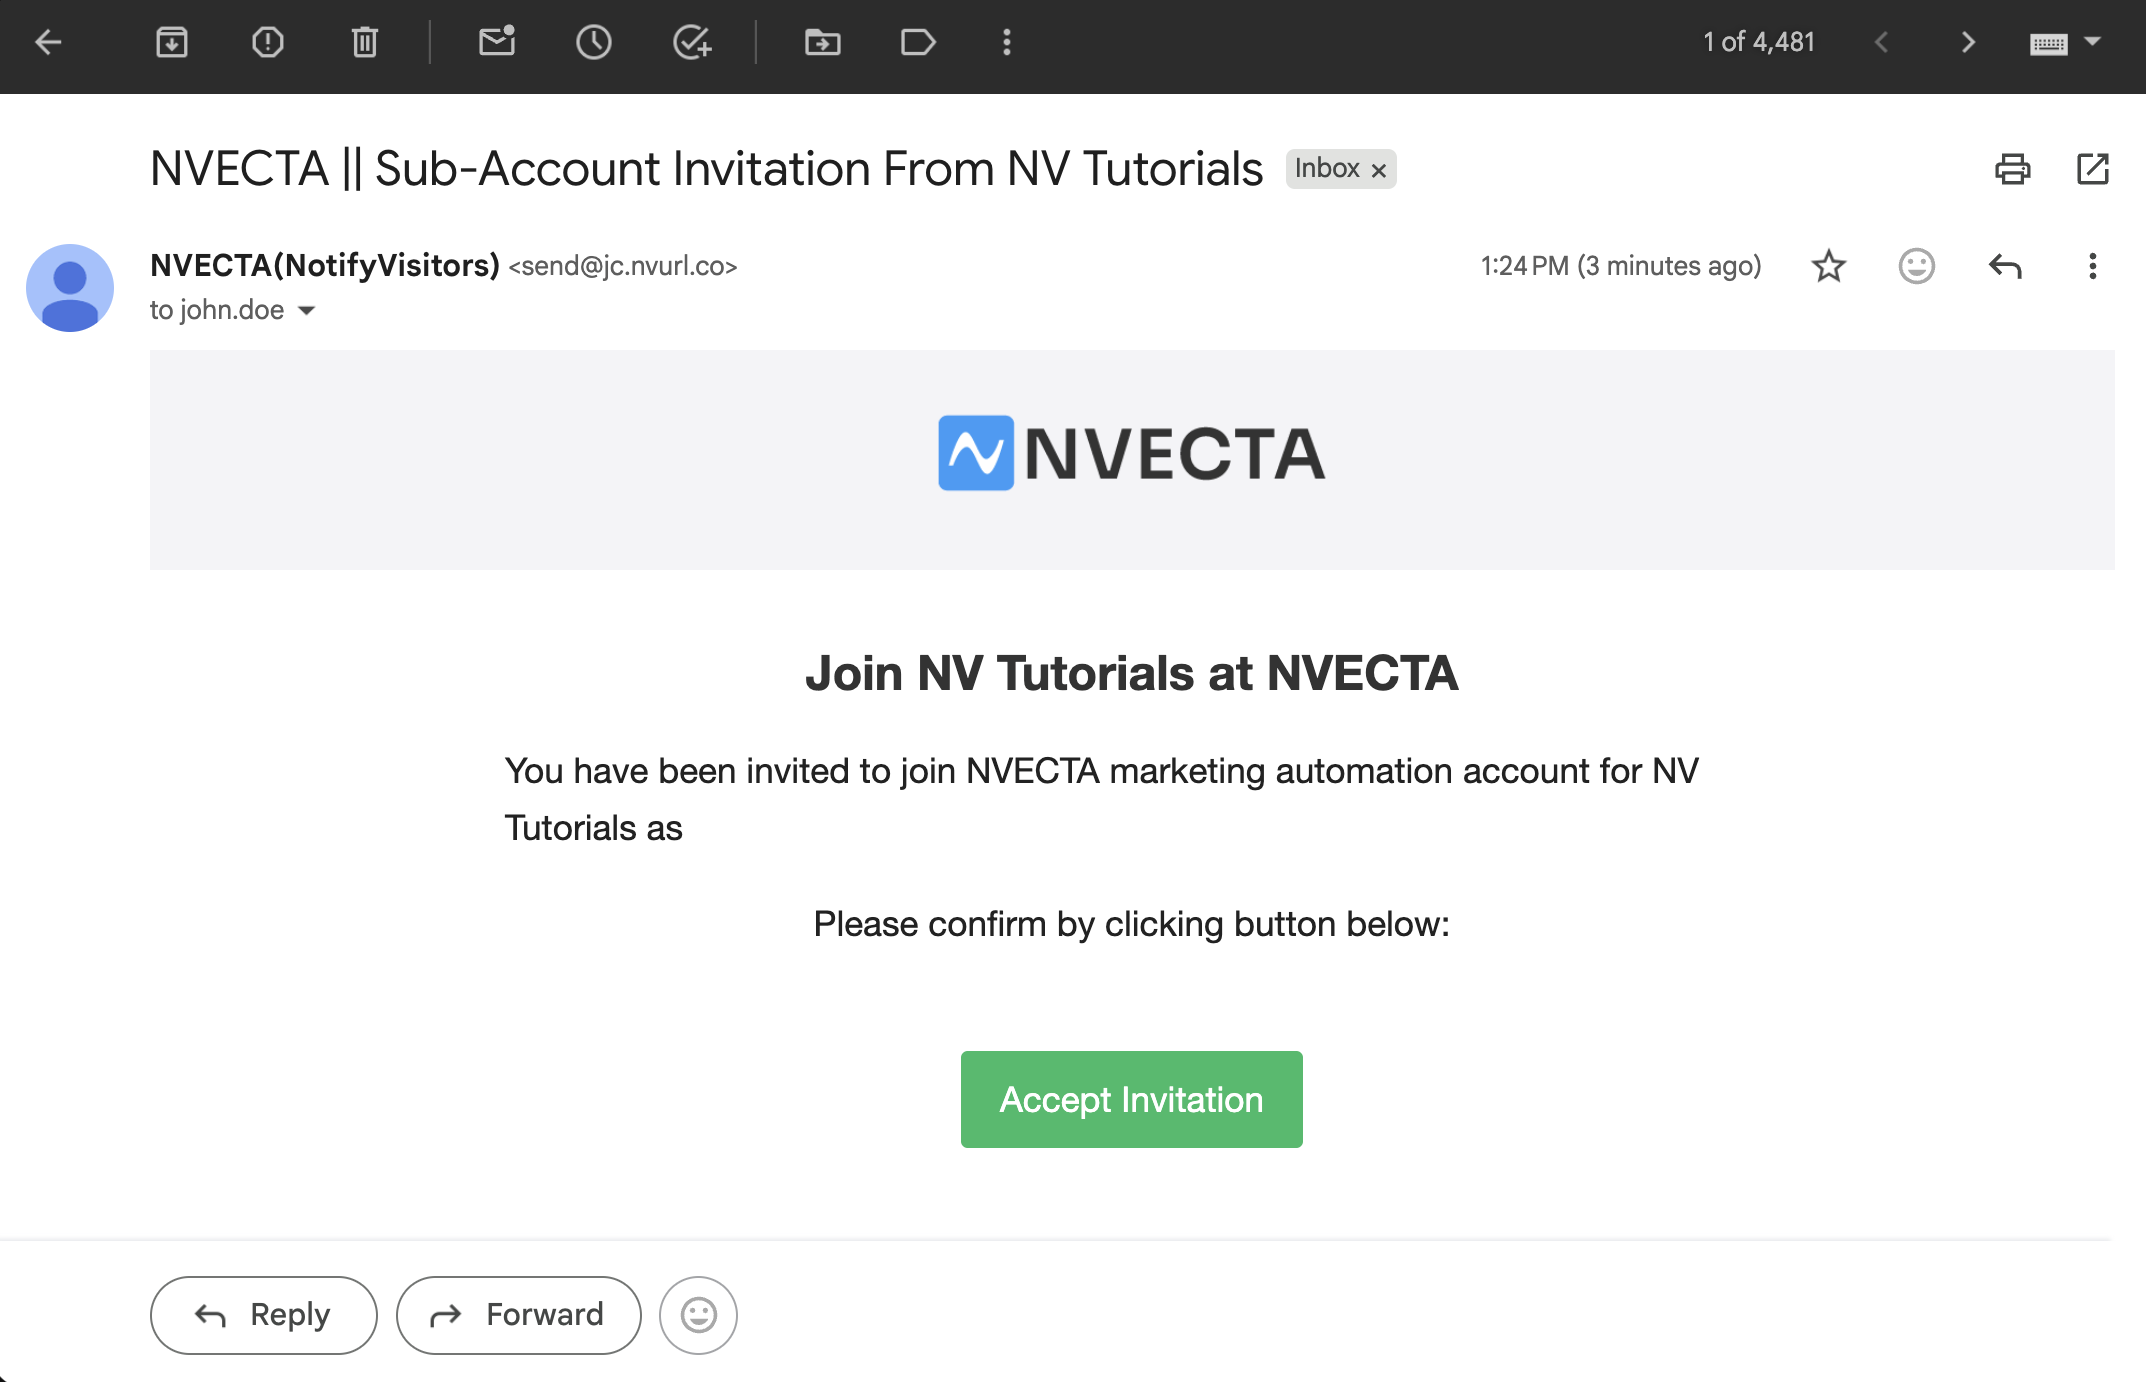
The invitation arrives as a link in the new user's inbox. If it doesn't reach them the first time, you can use the Resend invitation option to send it again. Once the user accepts the invitation, the resend option disappears.
After the user creates a password and clicks Confirm, they are redirected to the main NVECTA dashboard and can begin using the account.
Changing a user's role and status
You can update a user's access at any time from the Users tab.
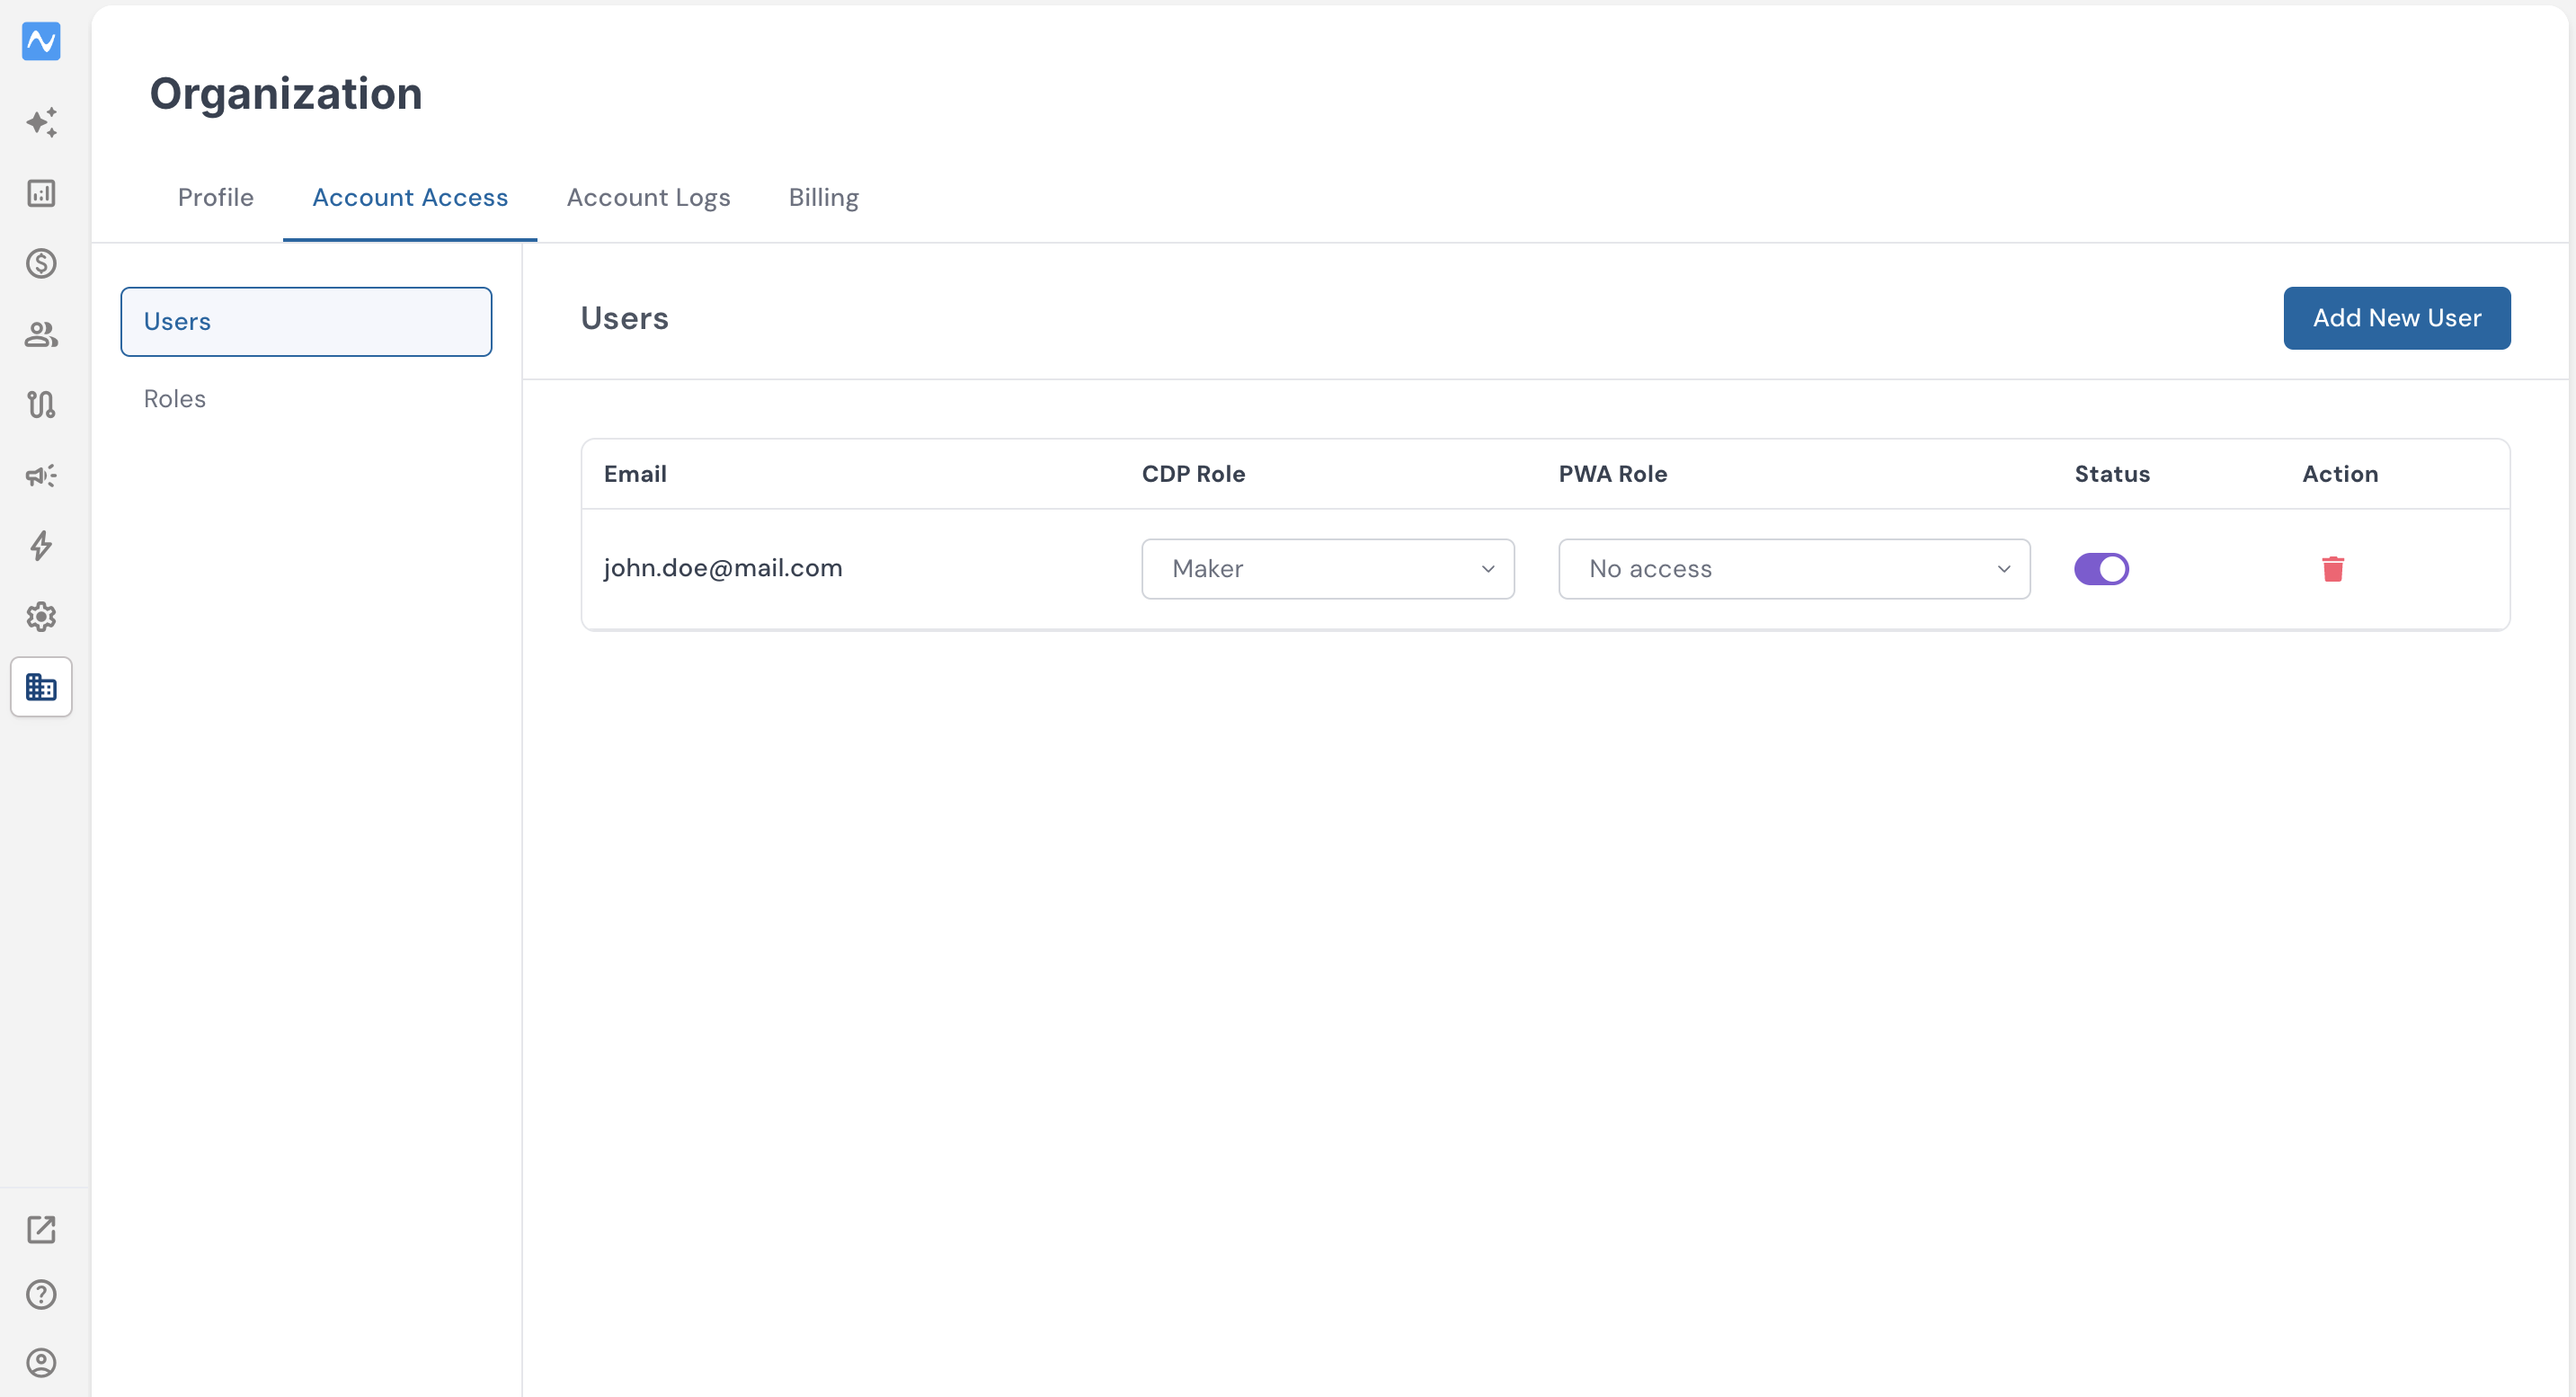
- Status — switch a user between Active and Inactive. Setting someone to Inactive removes their ability to use the account without deleting them, which is useful when an employee leaves or temporarily changes responsibilities.
- Role — reassign a user to a different role whenever their responsibilities change. The new permissions take effect based on the role you choose.
Roles
A role is a bundle of permissions. Instead of configuring access person by person, you assign people to roles, and each role determines what its members can access across the panel.
NVECTA ships with a set of default roles so you can get started quickly, and it also lets you create custom roles tailored to your organisation.
Default roles
The default roles cover the most common needs:
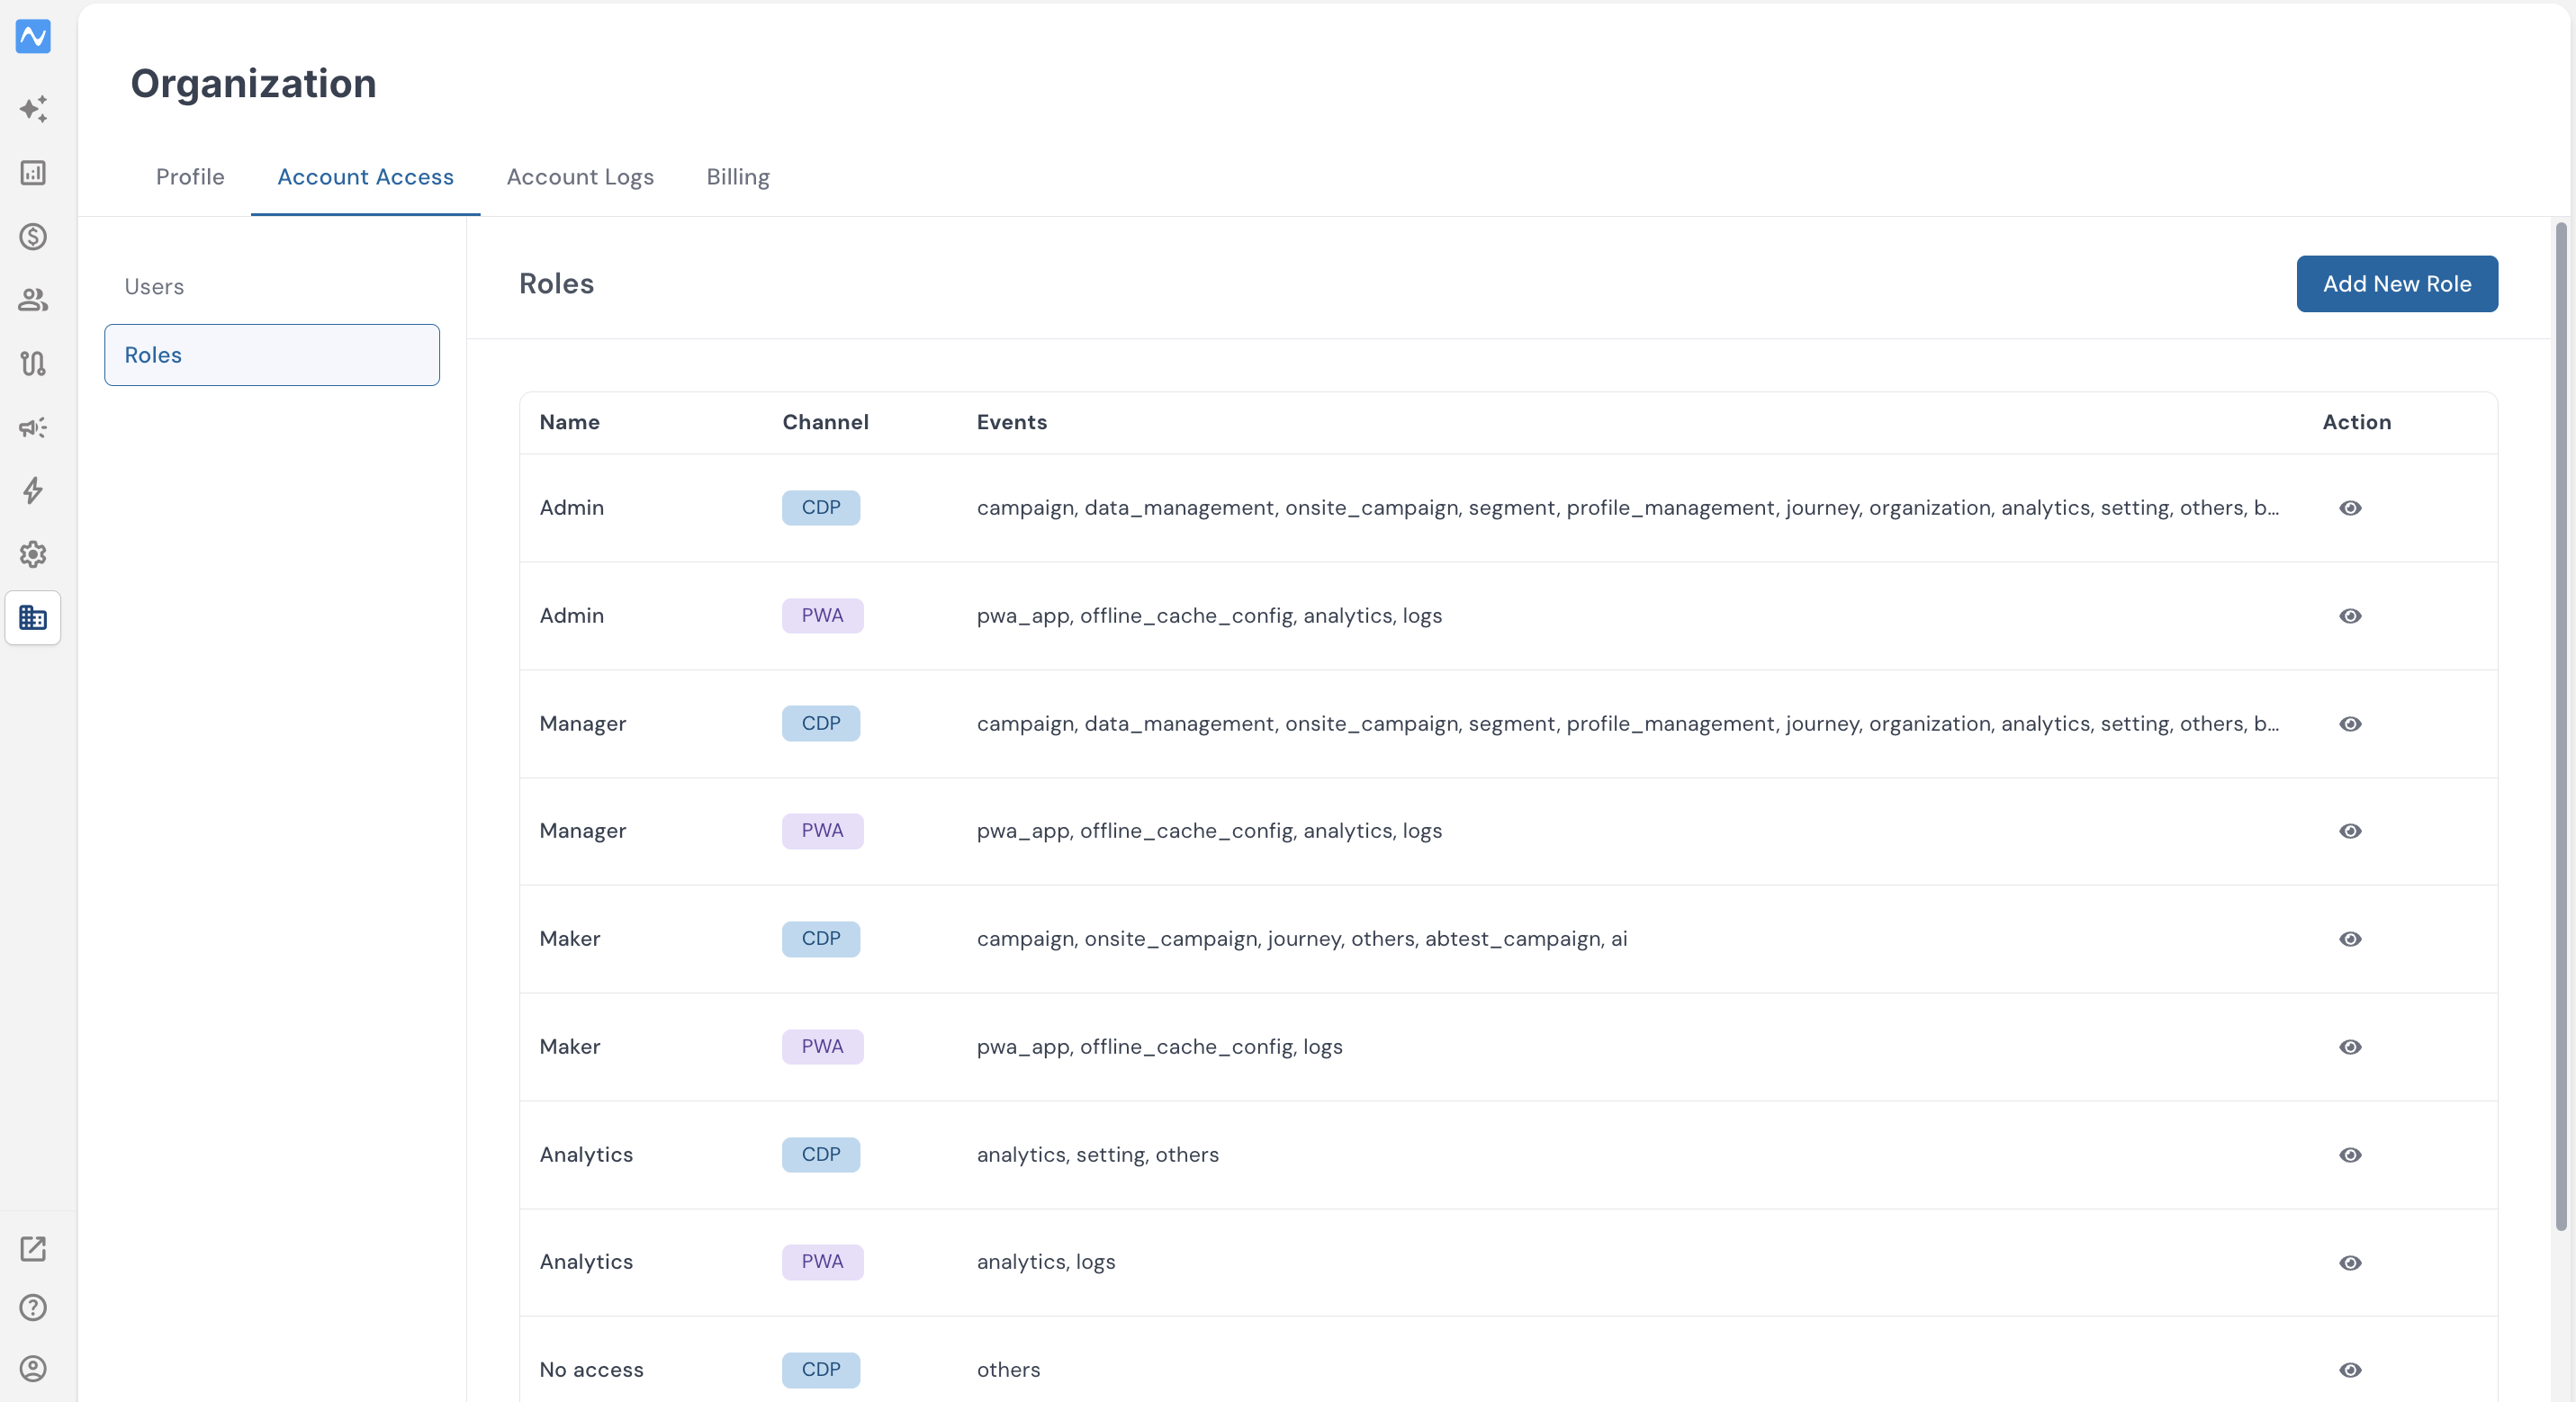
- Admin — Full access across the platform, including Campaigns, Data Management, Onsite Campaigns, Segments, User Profile Management, Journeys, Organisation settings, Analytics, Settings, Brand Assets, and more.
- Manager — Similar access to Admin, except the ability to manage Organisation settings.
- Maker — Limited access focused on building and running work, such as Campaigns, Onsite Campaigns, and Journeys, plus some functionality grouped under "Others."
- Analytics — Focused on Analytics and Settings, with access to additional features under "Others." Ideal for people who need to view stats and reports without editing campaigns.
- No Access — Minimal or no access to most functionality, except items under "Others."
These give you a sensible starting point for assigning responsibilities based on each person's function in the organisation.
Note: Only an Admin or the Account Owner can edit roles.
Adding a custom role
When the defaults don't fit your team structure, create your own role with exactly the permissions you need.
- Go to the Organisation tab in the NVECTA dashboard.
- Open Account Access and select the Roles tab.
- Click Add New Role.
- On the screen that appears, enter a name for the role and select the specific access you want to grant from the permissions table.
- Click Add Role.
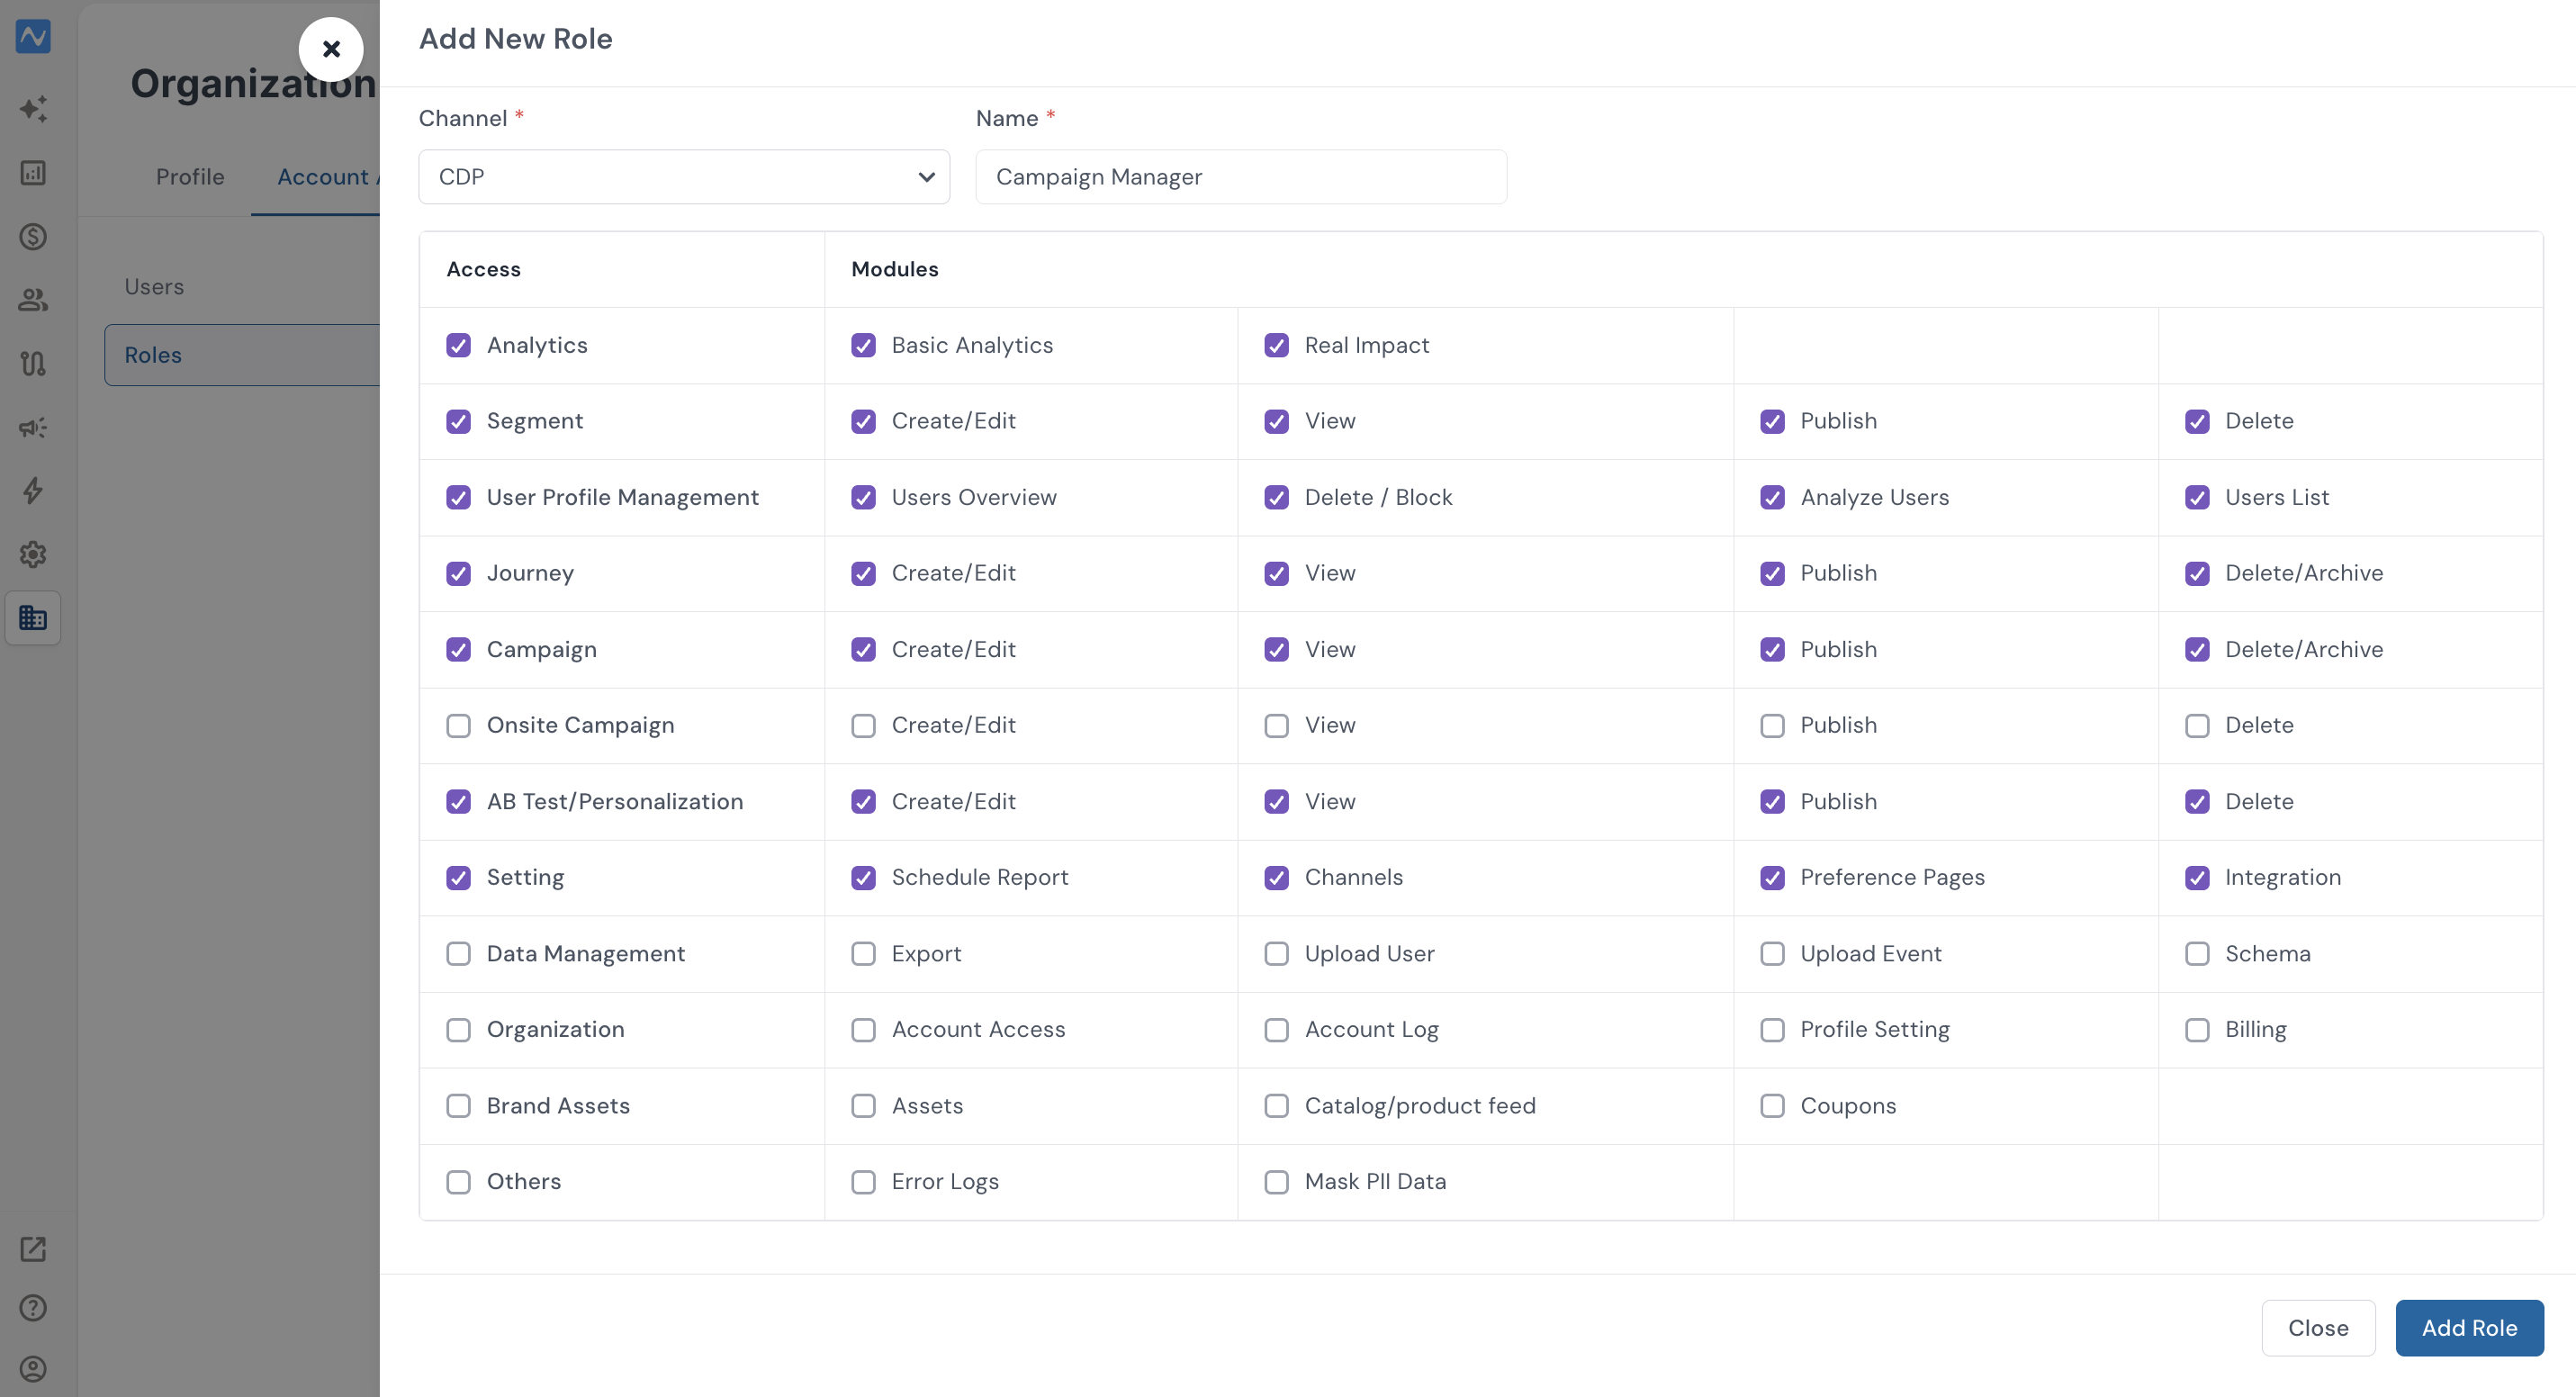
The new role then appears in the Roles table and becomes available to assign to users. You can revisit any custom role later using the edit option to adjust its permissions.
PII masking: protecting sensitive customer data
Granting access to a role doesn't have to mean exposing every piece of customer data. PII masking lets you hide Personally Identifiable Information, such as user IDs, email addresses, and phone numbers, from specific roles, adding an extra layer of control and security on top of standard permissions.
This is especially valuable when team members need to work with customer data, for example to run analytics or build segments, but have no business reason to see individual identities.
What counts as PII
PII (Personally Identifiable Information) is any data that could identify an individual, including names, email addresses, phone numbers, and similar details. PII masking hides this information from the roles you choose.
Enabling PII masking on a custom role
PII masking is configured on custom roles. When you create or edit a custom role, you'll see a Mask PII Data option. Turning it on hides user IDs, email addresses, and phone numbers from anyone assigned to that role.
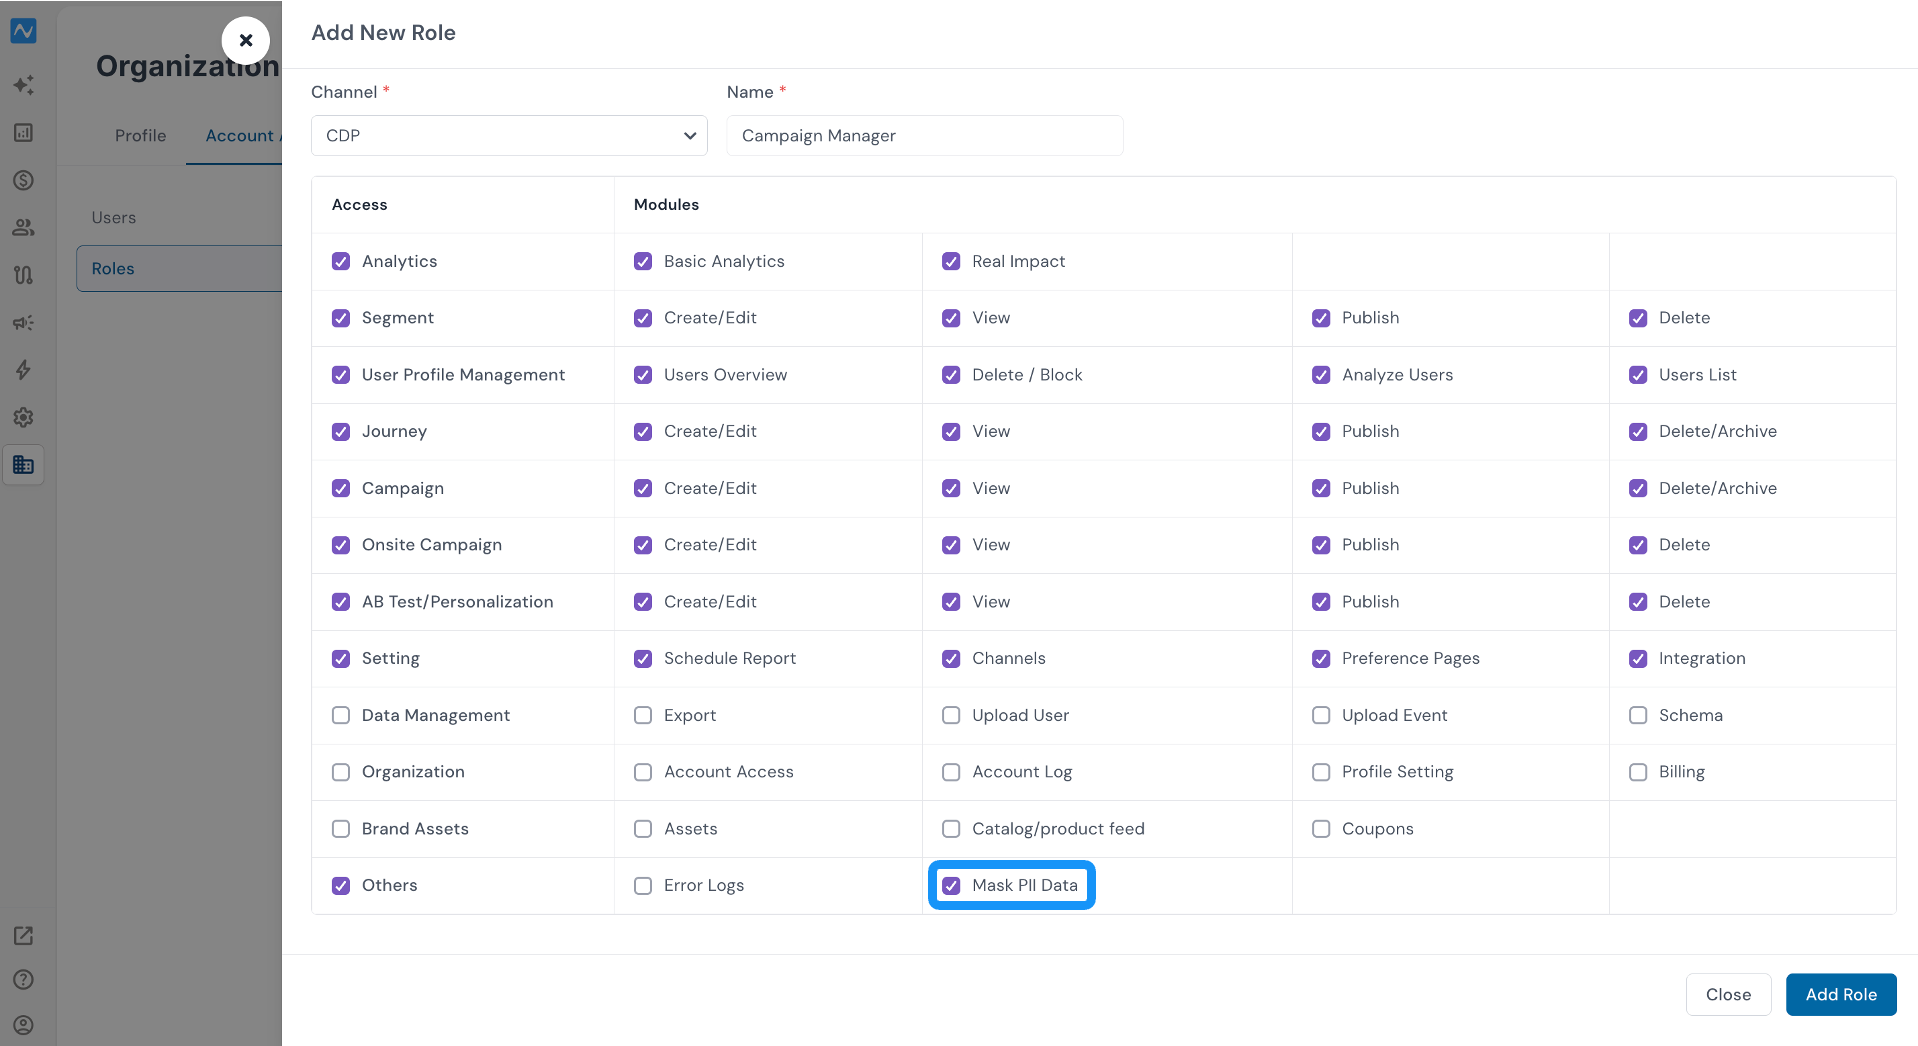
You can enable masking at two points:
- While creating a new custom role.
- Later, by using the edit option next to an existing custom role in the Roles section.
For example, you might create custom roles such as "Analyst" and "Marketing Analyst" and enable PII masking on them, so these team members can do their work without viewing sensitive customer details.
Note: PII settings cannot be modified for default roles. To modify PII masking, use a custom role.
Masking custom attributes too
Many organisations track custom attributes beyond the standard fields, such as user behaviour, purchase history, or demographic data. Admins can bring these under PII masking as well.
- Go to the Settings section.
- Select Users.
- You'll see a list of your custom attributes.
- As an admin, you'll find an "Is PII" option next to each attribute. Turn it on for any attribute you want to mask.
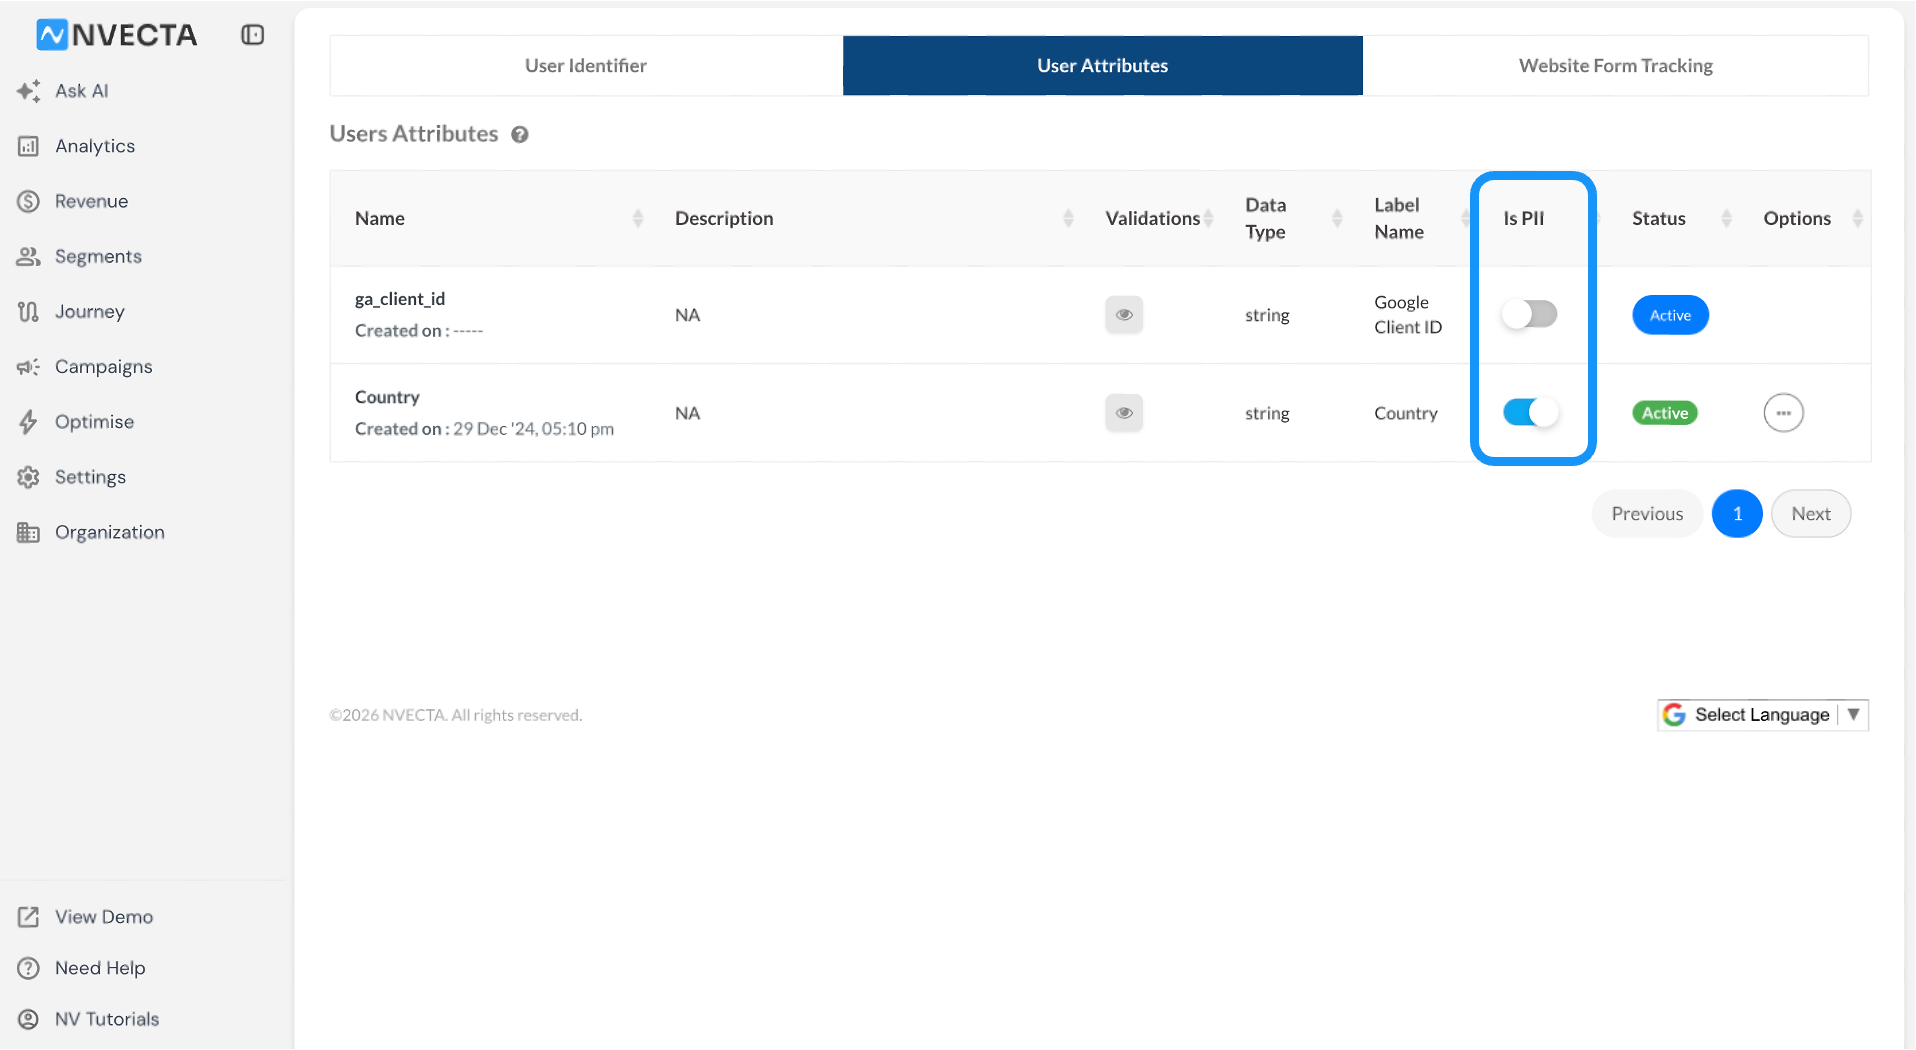
How masked data appears
When someone in a PII-masked role views data, the protected fields, user ID, email address, phone number, and any custom attributes marked as PII, are replaced with "X."
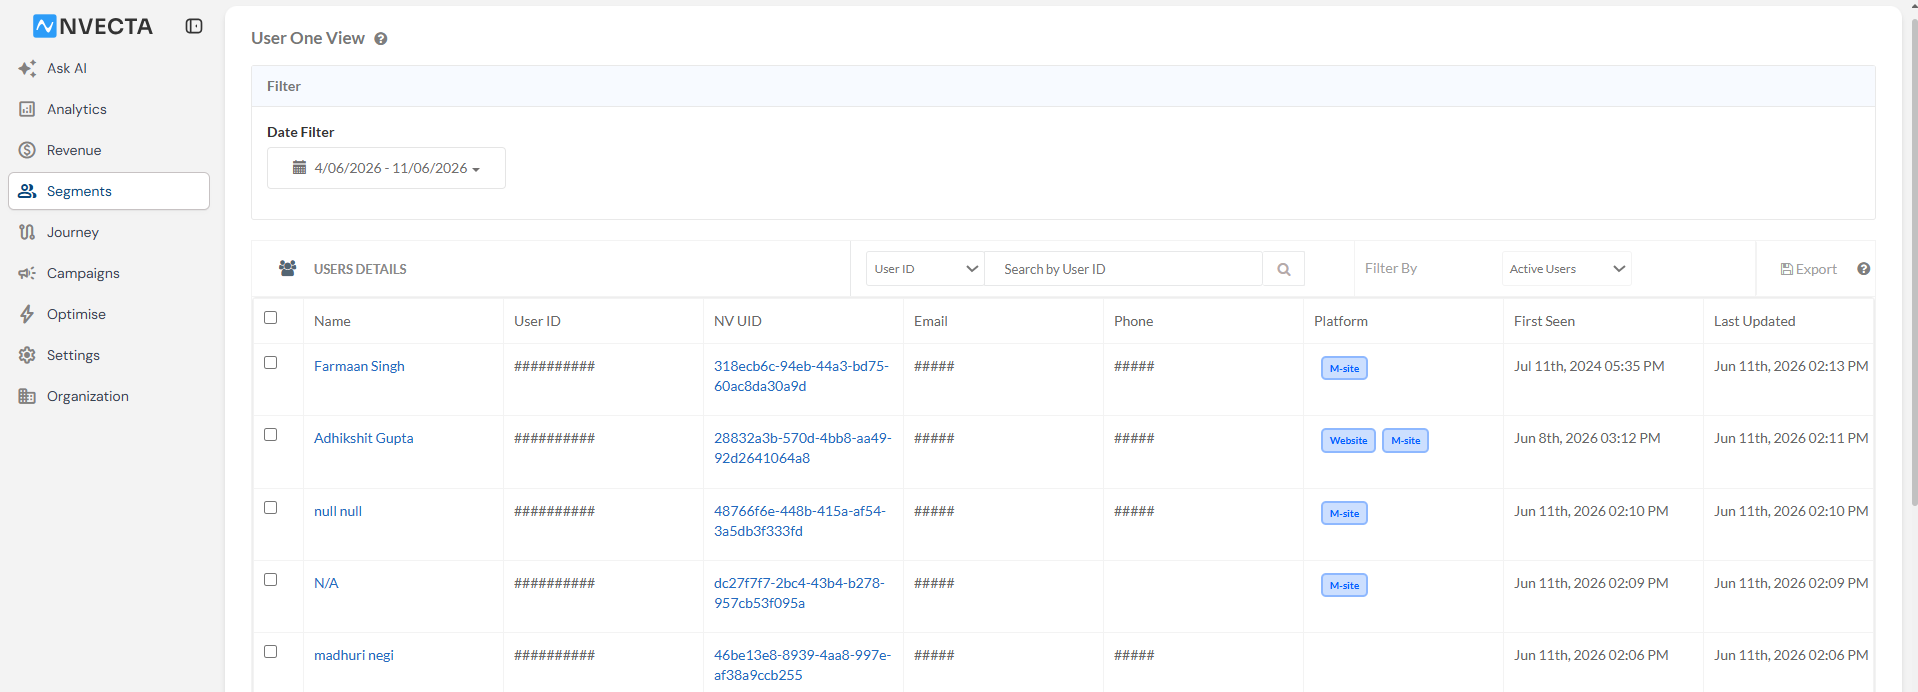
Importantly, this protection carries through to exports. If a masked user downloads a report, the masked data stays concealed, so sensitive information remains protected even outside the dashboard.
Putting it together
A typical setup looks like this: invite your team members under the Users tab, assign each one a role that matches their responsibilities, and use Active/Inactive status to manage access over time. Rely on the default roles where they fit, and build custom roles where you need finer control, enabling PII masking on those custom roles whenever a team member should work with data but not see who the data belongs to.
The result is a workspace where everyone has exactly the access they need, no more and no less, and where sensitive customer information stays protected in line with your data privacy obligations.
Was this article helpful?
That’s Great!
Thank you for your feedback
Sorry! We couldn't be helpful
Thank you for your feedback
Feedback sent
We appreciate your effort and will try to fix the article