In the face of escalating cyber threats, it's vital for organizations to prioritize robust security measures to safeguard user accounts. While NVECTA is a highly secured customer data platform, we provide additional controls so you can strengthen the security of your data and decide exactly how — and from where — your team signs in.
This guide covers two account-access security features you can manage from the Organization section of your dashboard:
- Two-Factor Authentication (2FA) — adds a second identity check at login.
- IP Whitelisting — limits account access to the networks (IP addresses) you trust.
You can use either feature on its own, or use both together for layered protection.
Two-Factor Authentication (2FA) for Login
Two-factor authentication (2FA) is a crucial security feature that adds an extra layer of protection to account login by requiring users to verify their identity through two distinct methods — typically a password and a second factor like a one-time code sent to your email address. This additional step significantly enhances security even if passwords are compromised, and protects against common cyber threats like phishing and identity theft.
Enable two-factor authentication for login
Enabling Two-Factor Authentication (2FA) for NVECTA account login is a straightforward process. Begin by navigating to the Organization section of your NVECTA dashboard and select the Account Access tab.
Here, within the Users tab, scroll down to the "2FA Setup" section and click on "Enable 2FA" to start the setup process.
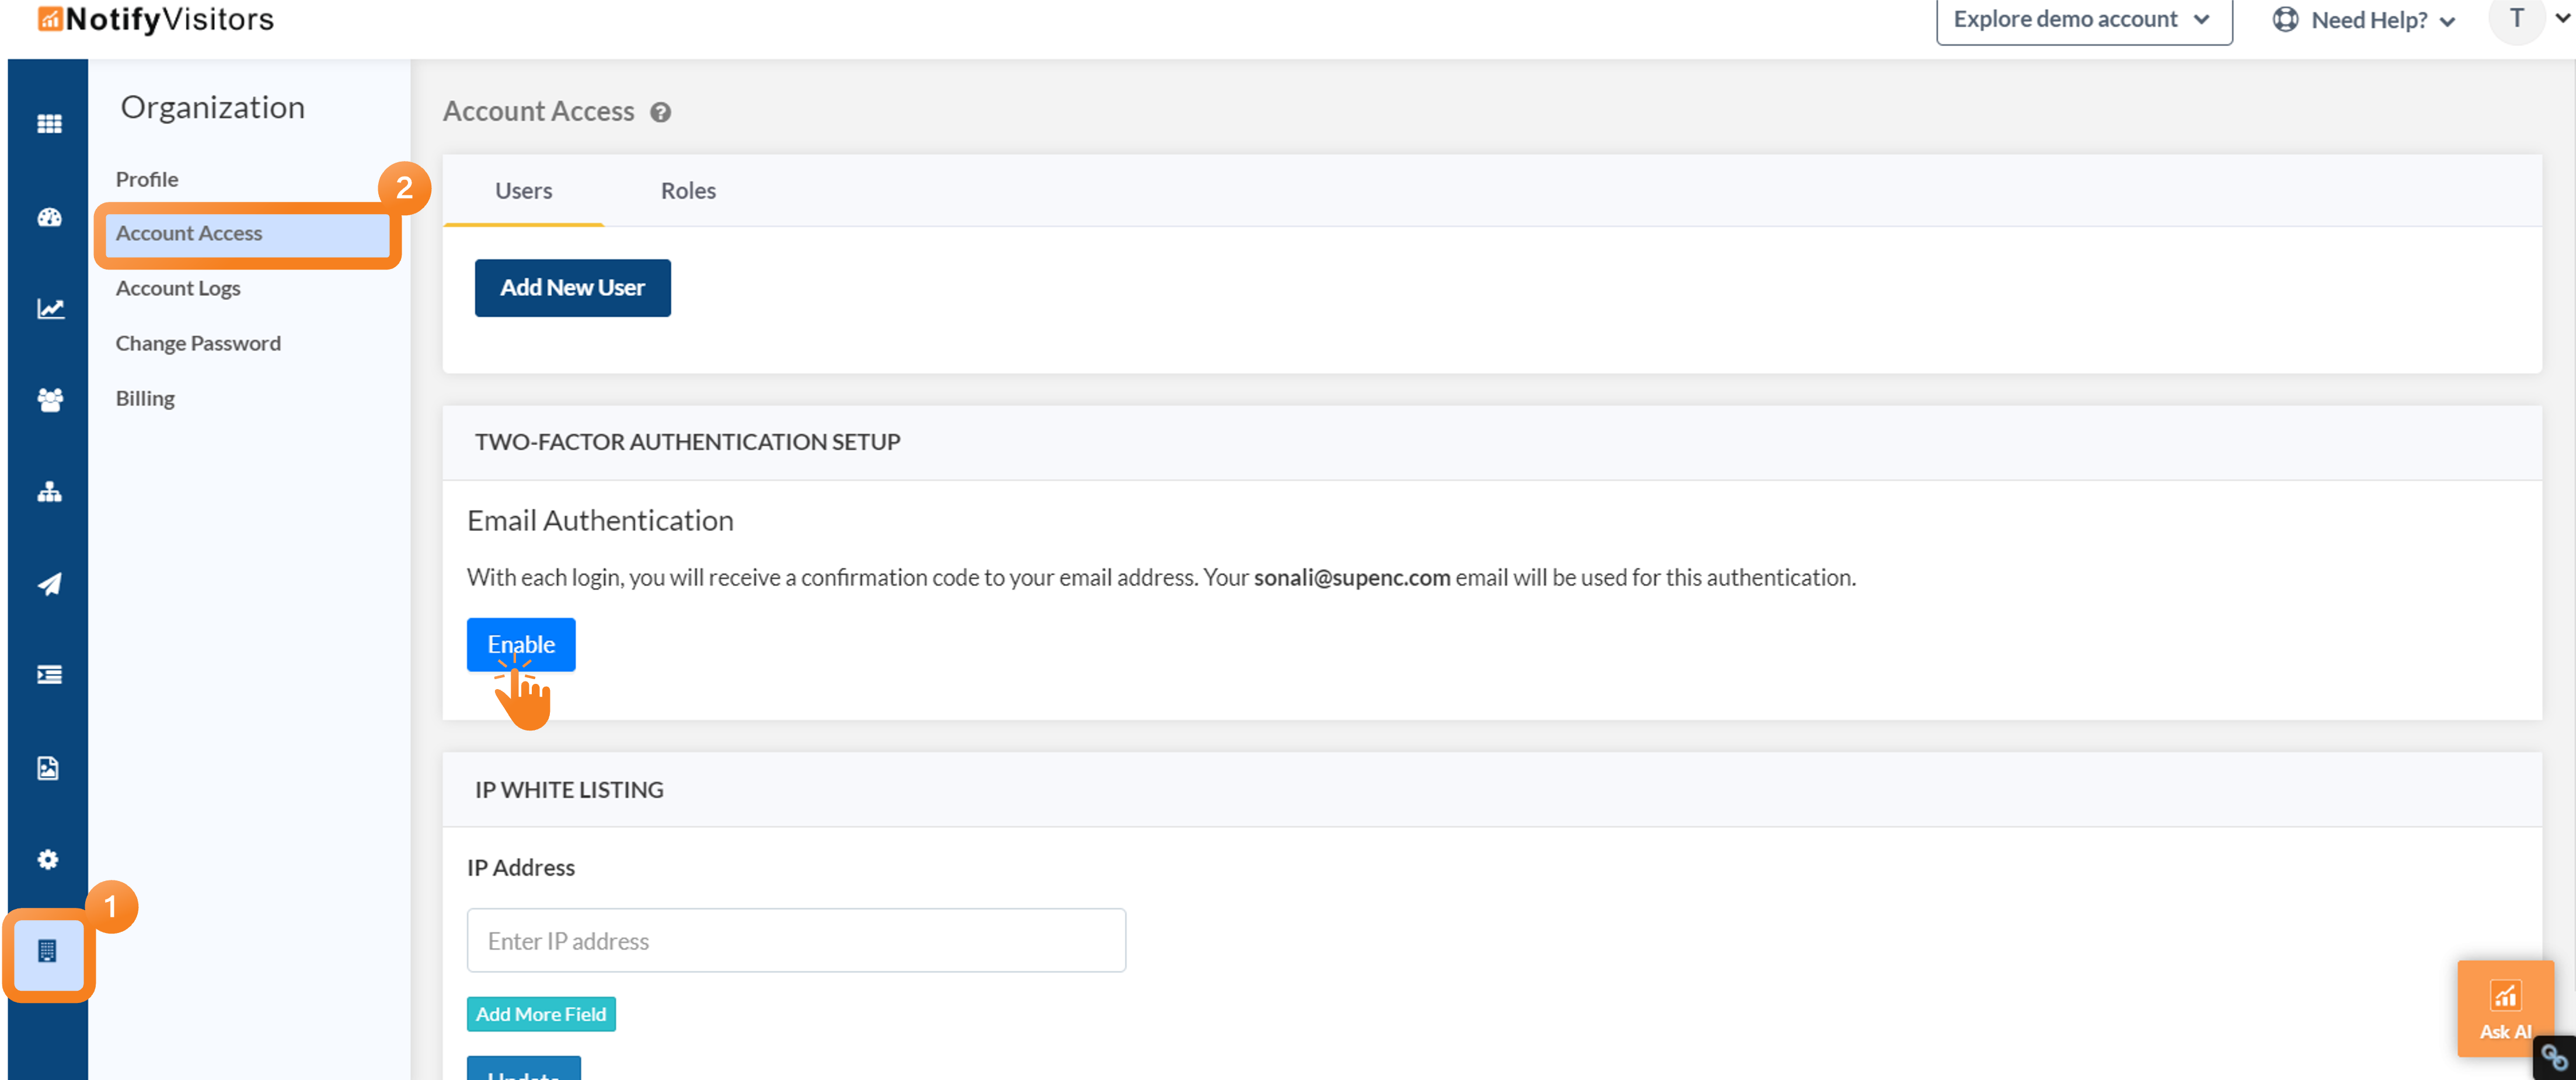
Once you click the Enable button, you will be prompted to enter a one-time password (OTP) sent to your registered email address. This OTP will only be valid for 15 minutes.
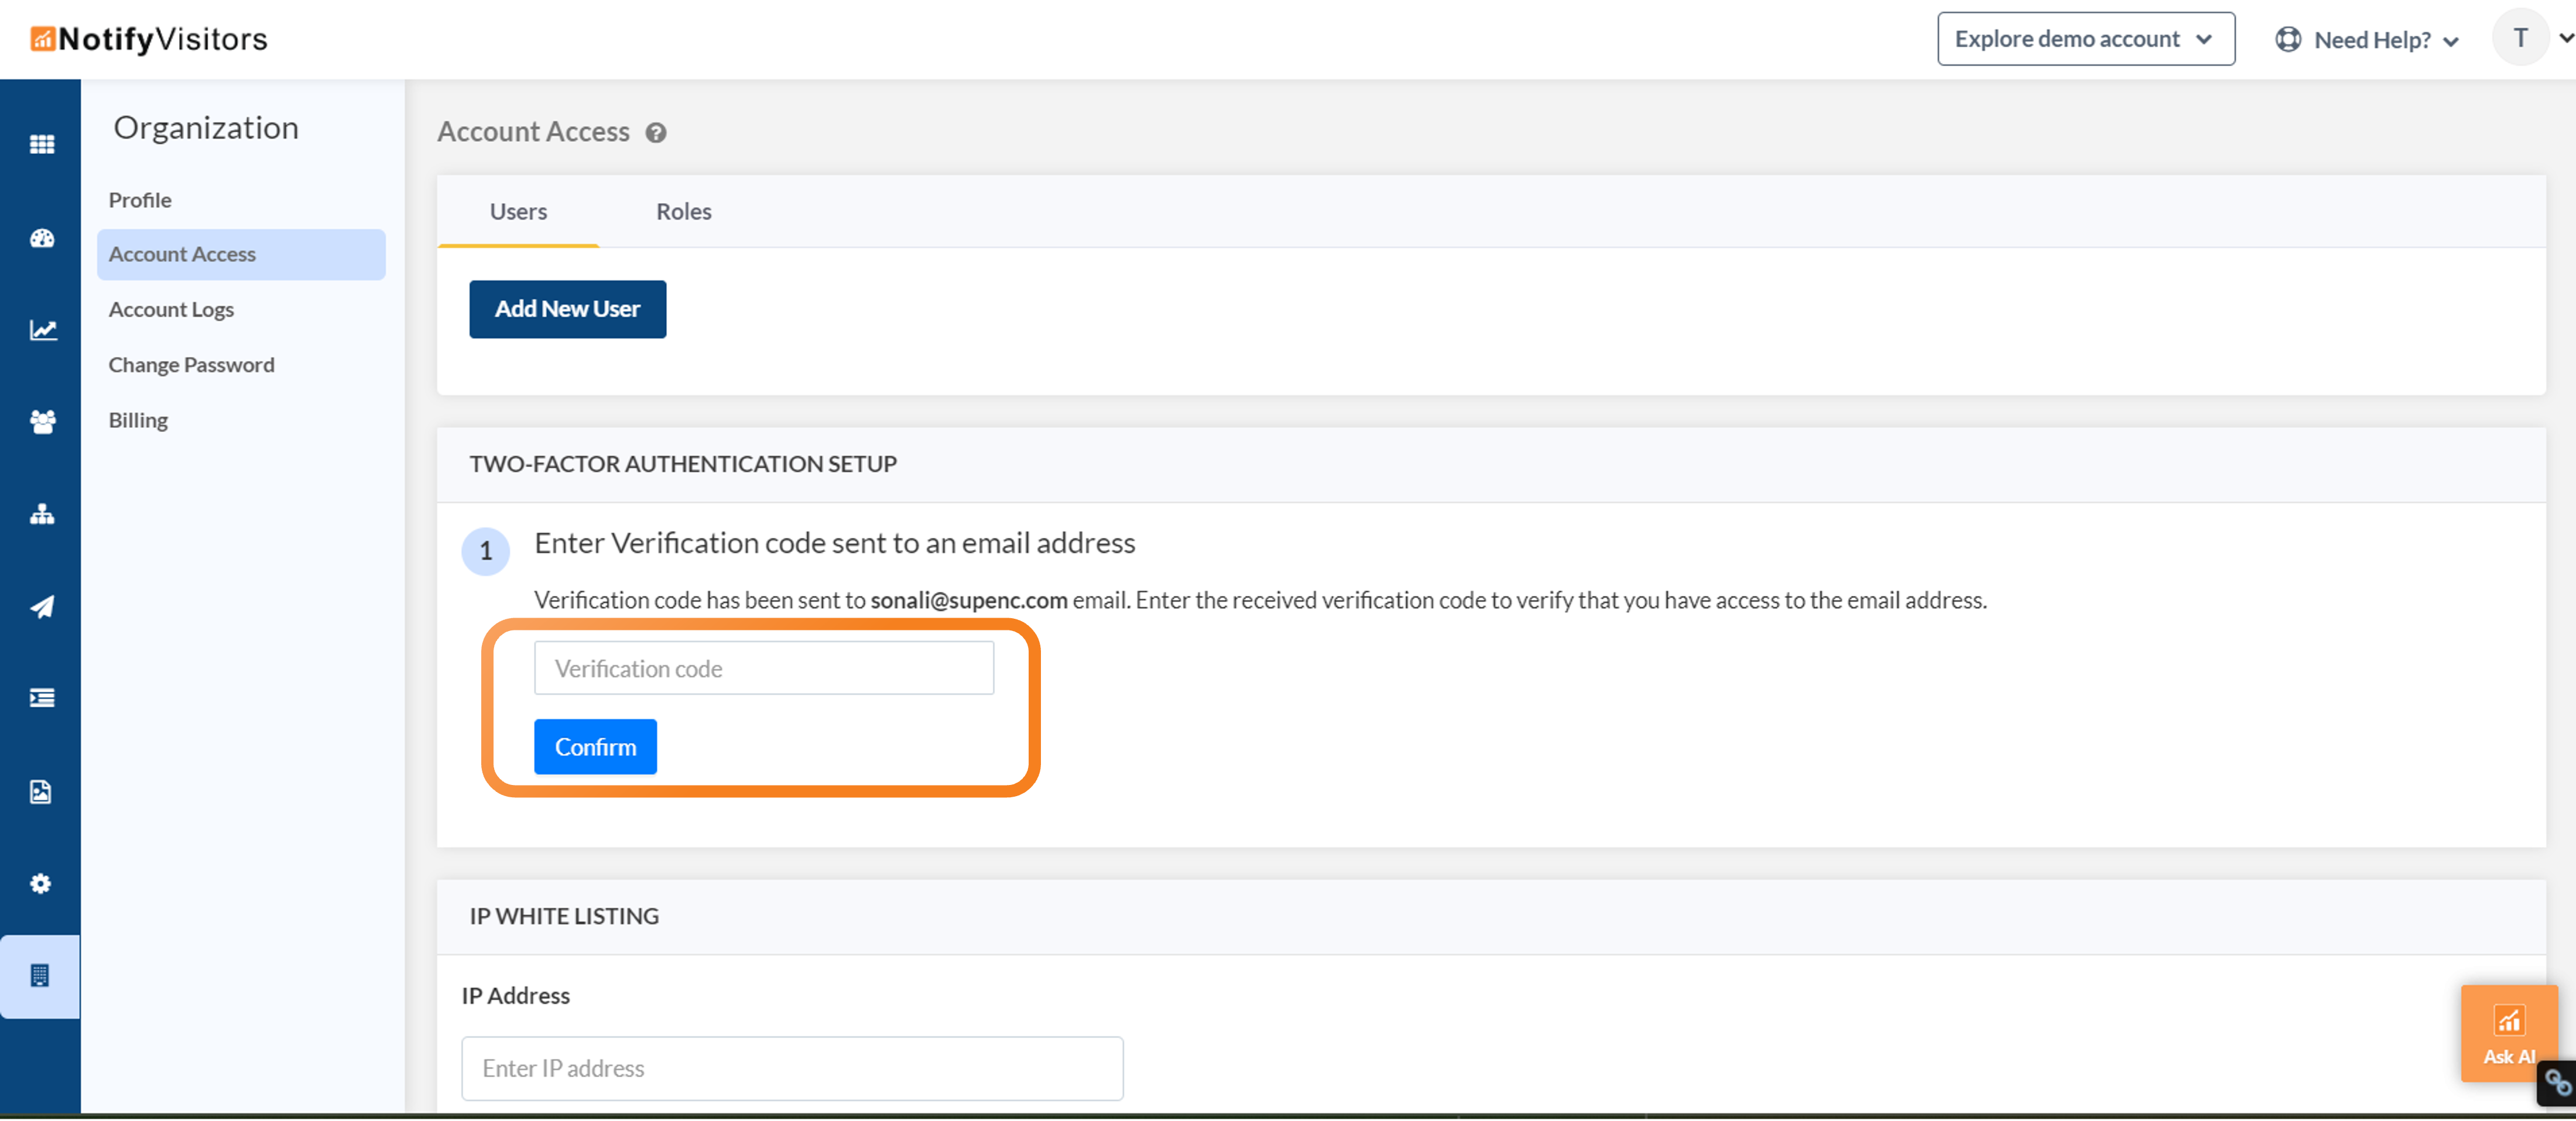
Note: Only the admin of your NVECTA account can enable 2FA, and the OTP will be sent to the admin's email address.
To proceed, enter the OTP and click Confirm. Once confirmed, you'll receive a backup code for emergency access. Keep in mind that this backup code will only appear once and cannot be retrieved later, so be sure to copy it down and keep it safe. It's very important to store this backup code securely, as it provides an alternative way to access your account if you have trouble receiving the OTP or if you get locked out.
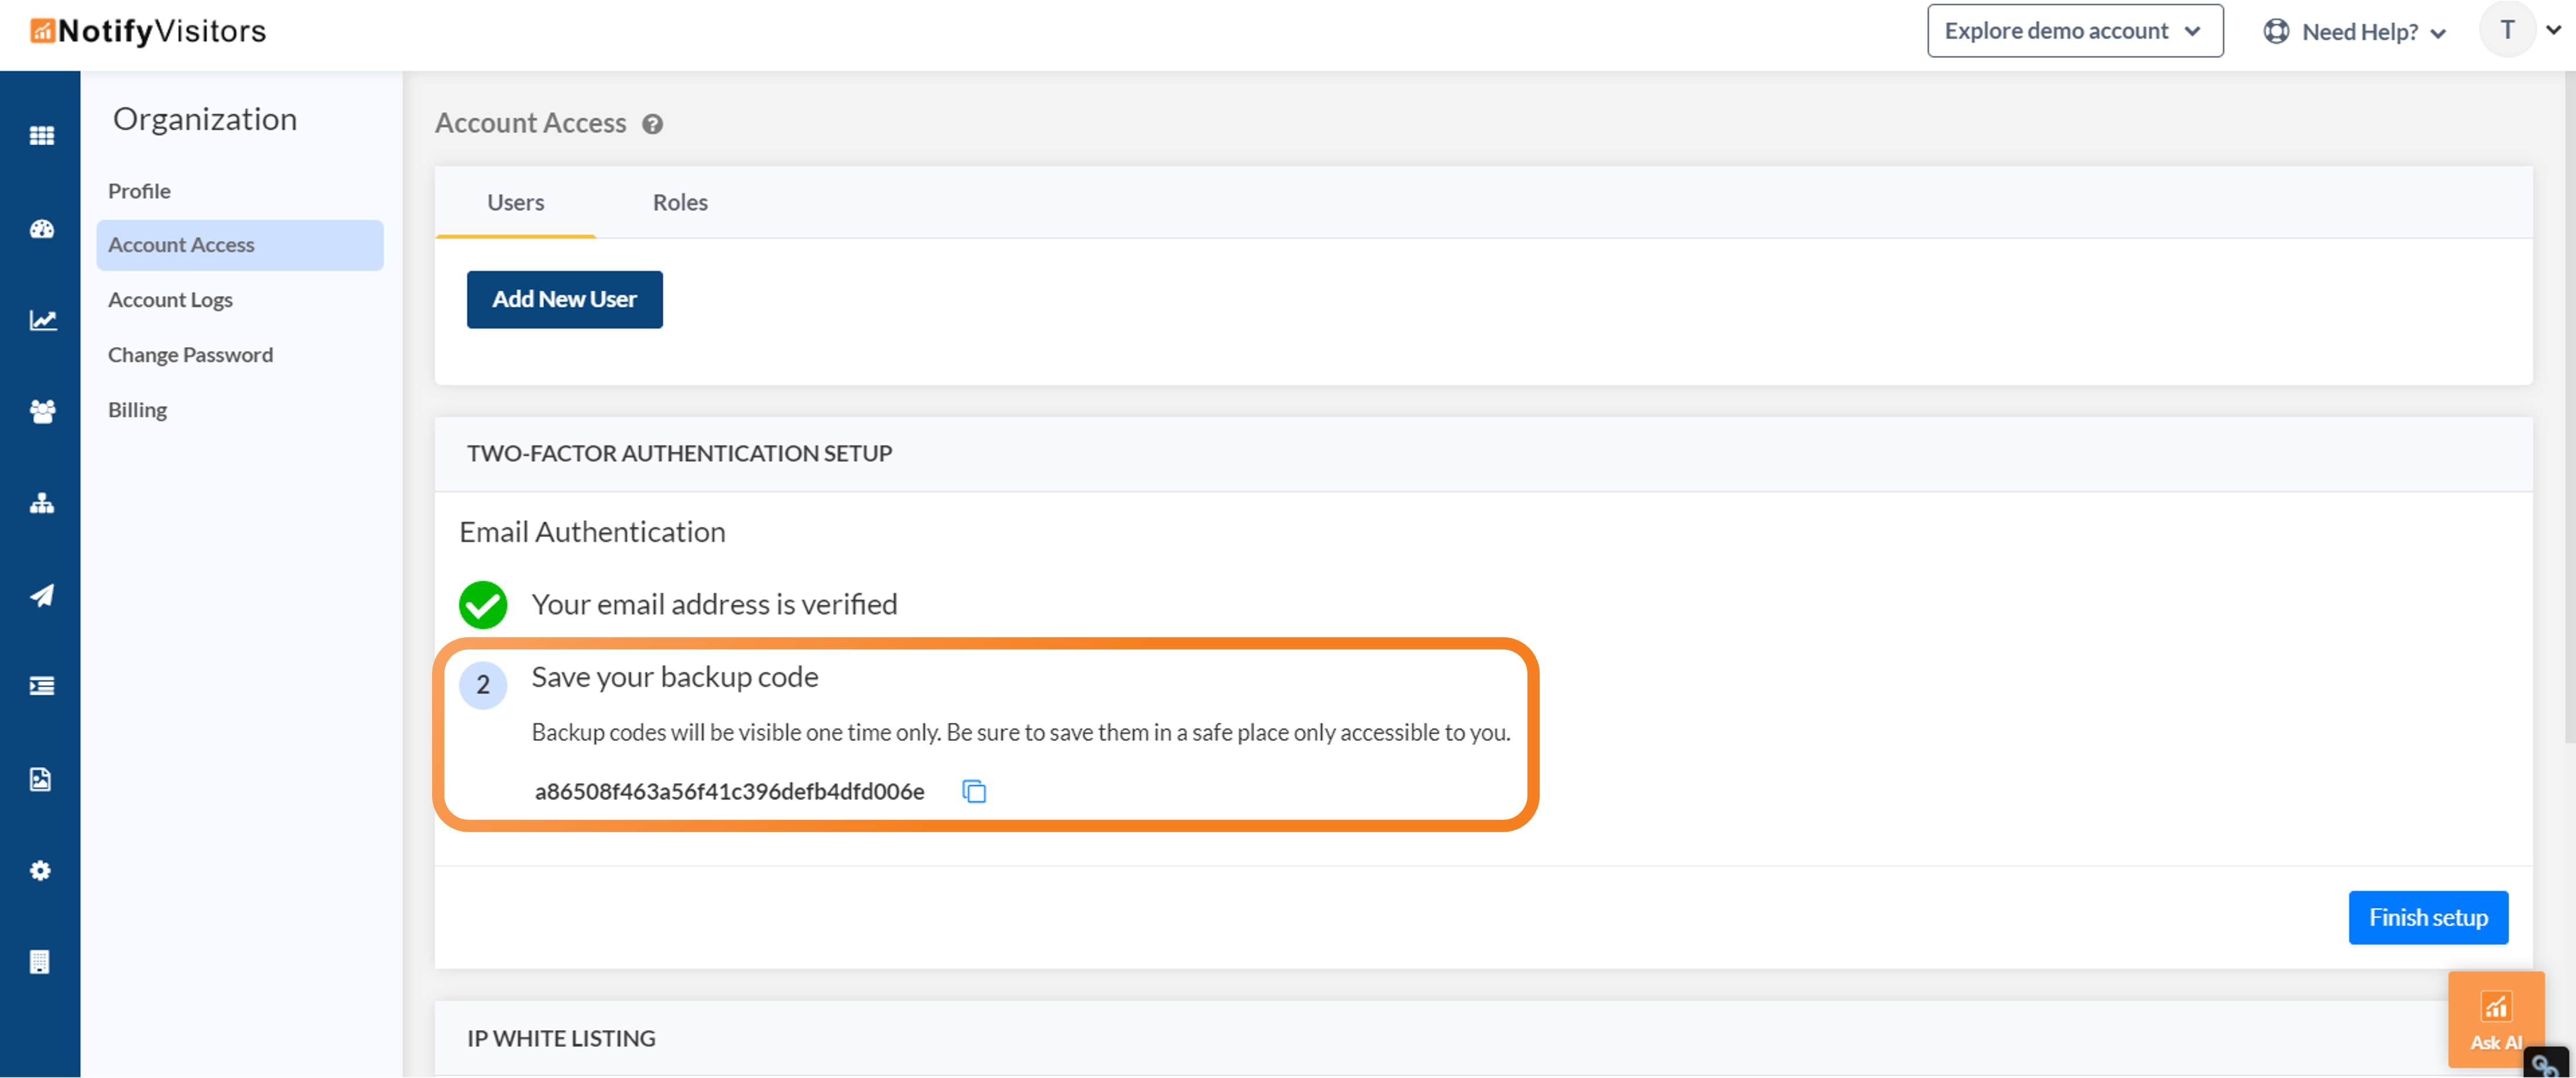
After securely storing the backup code, click "Finish Setup" to complete the process. This action signifies the successful activation of 2FA for your NVECTA account, ensuring enhanced security for all future logins.
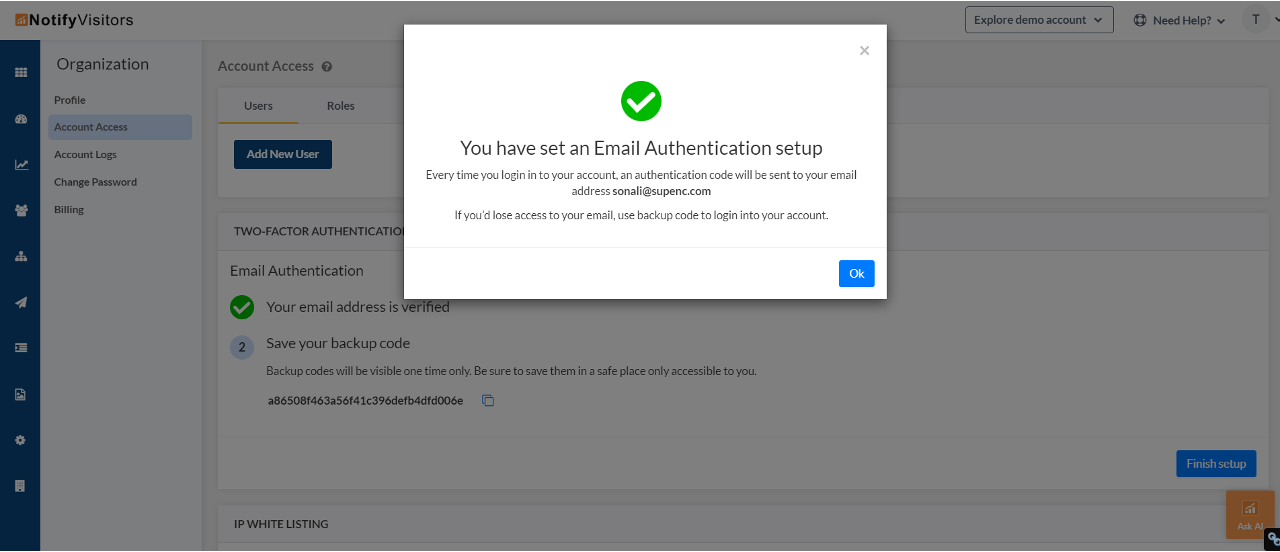
From now on, subsequent login attempts will require users to enter the password along with either the OTP received via email or the backup code.
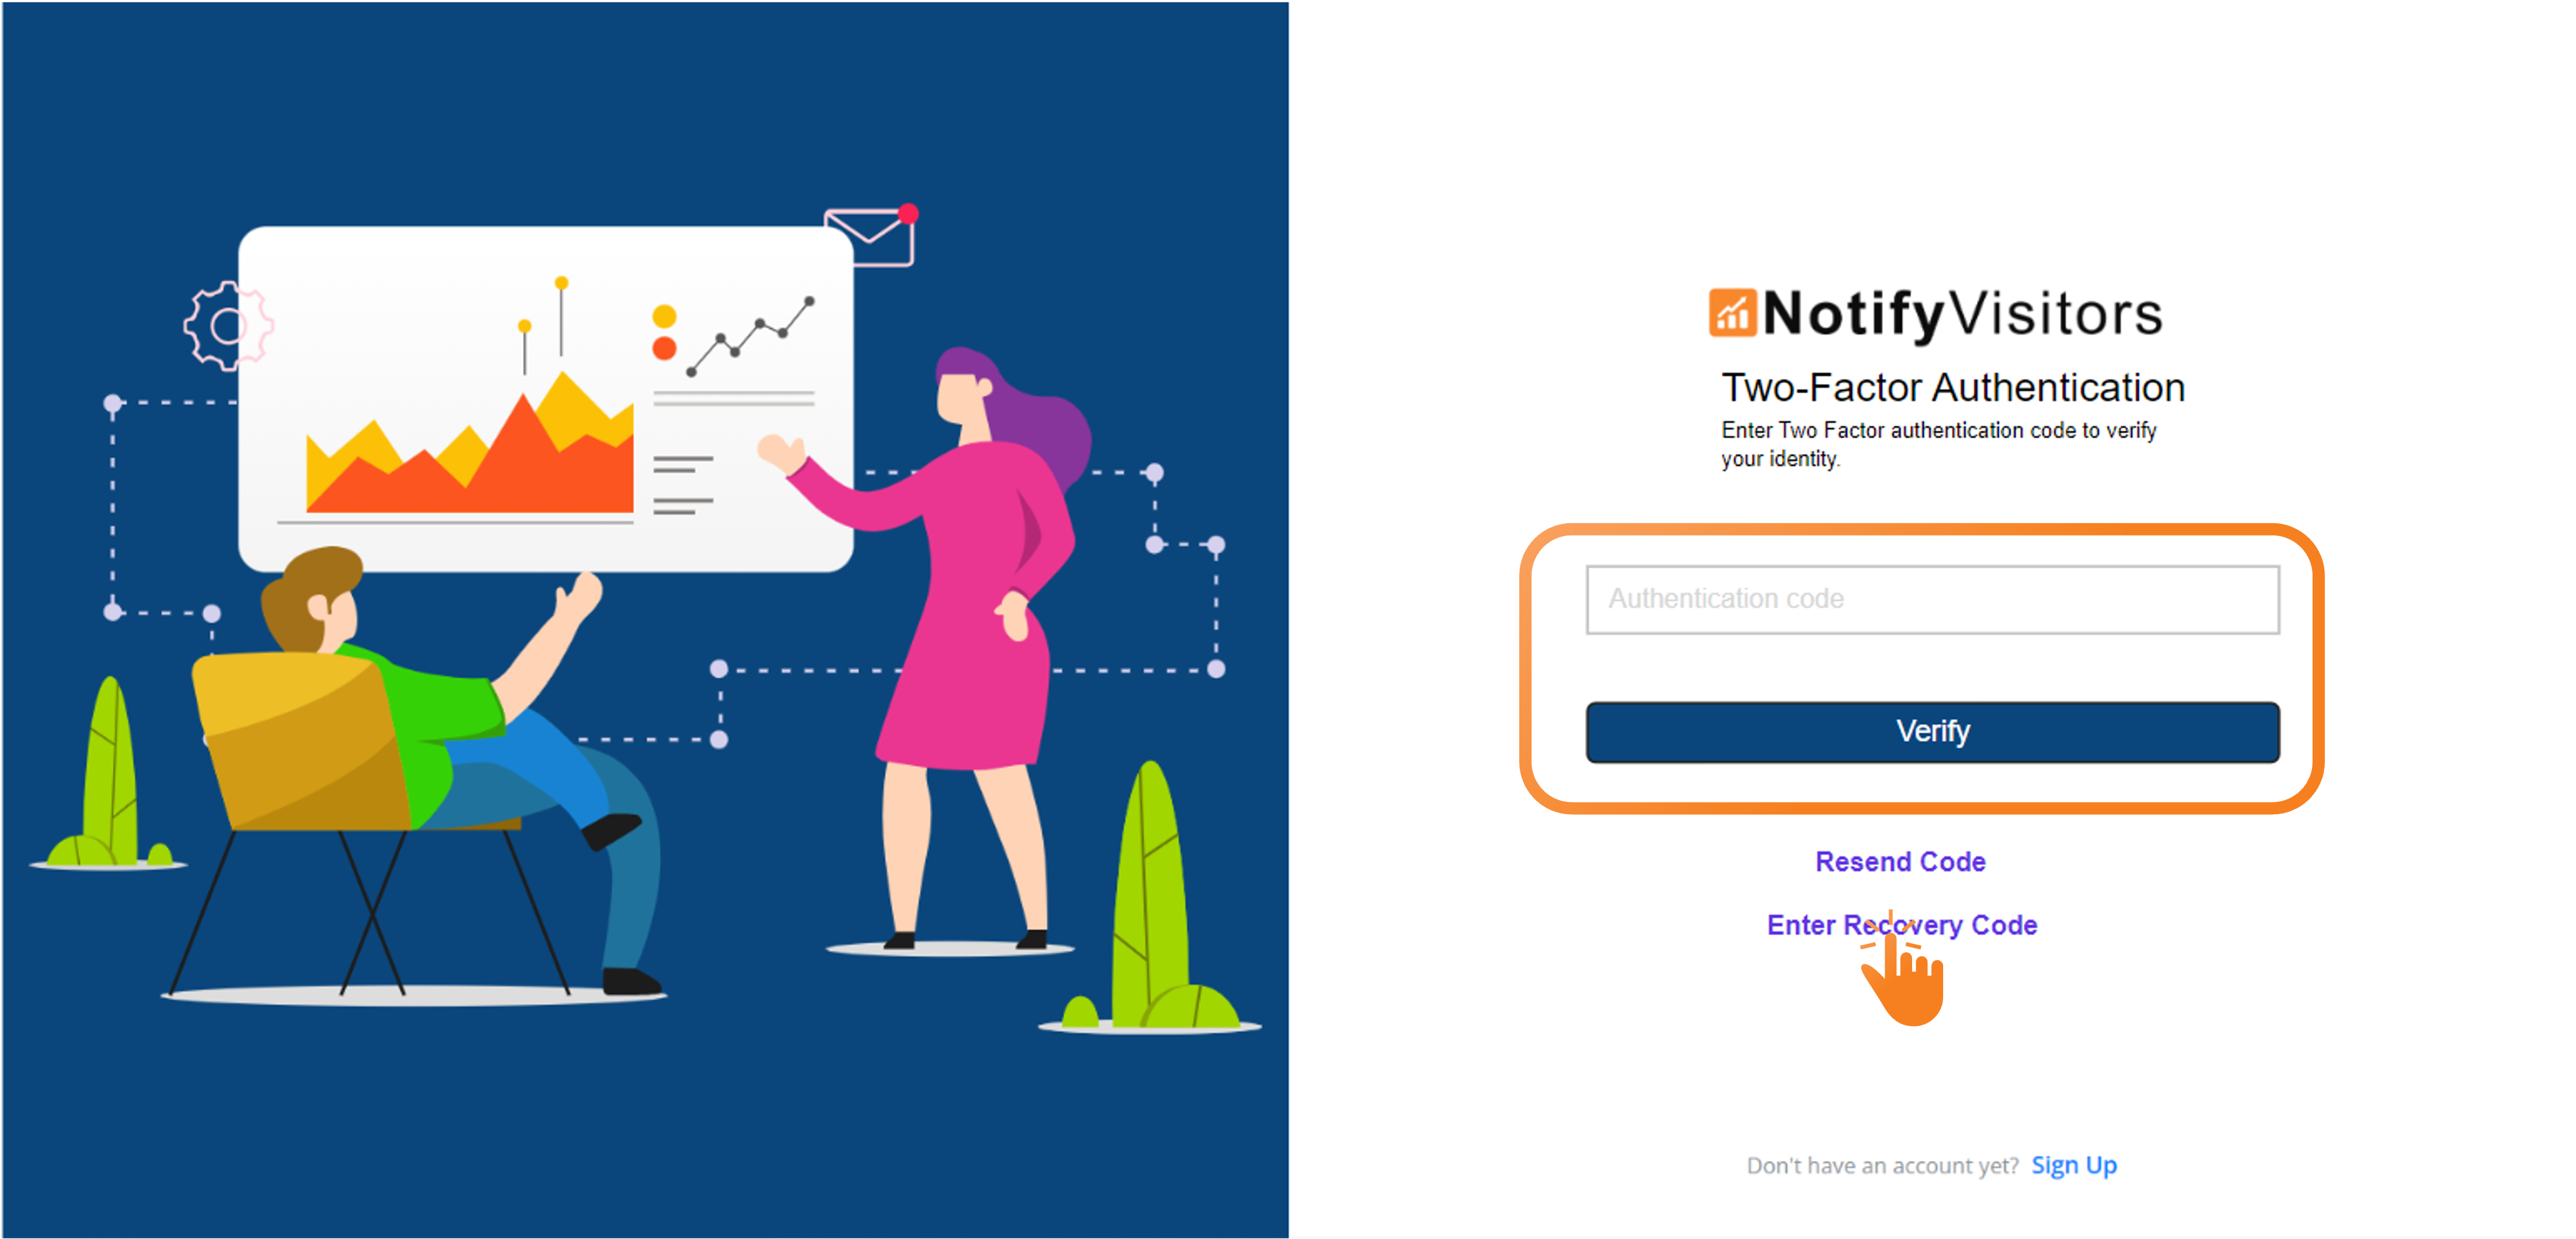
This dual authentication mechanism adds an extra layer of defense against unauthorized access attempts, bolstering account security.
Two-factor email verification for sub-account login
When a user logs in from a sub-account, NVECTA will verify whether two-factor authentication is activated on the main account associated with the original email address. If it is, an OTP will be dispatched to the email address of the user's sub-account.

For instance, as illustrated in the image, NVECTA will confirm if 2FA is enabled for jacob.k@mails.com. If it is, the OTP will be sent to andrew.s@mails.com.
This process enhances security for sub-account users, allowing them to log in independently without needing to request an OTP from the admin each time.
Disable two-factor authentication
To turn off two-factor authentication, head back to the same page: Organization > Account Access. There, click the Disable button located in the Two-Factor Authentication Setup section.
Once you click it, you'll have two options to disable it:
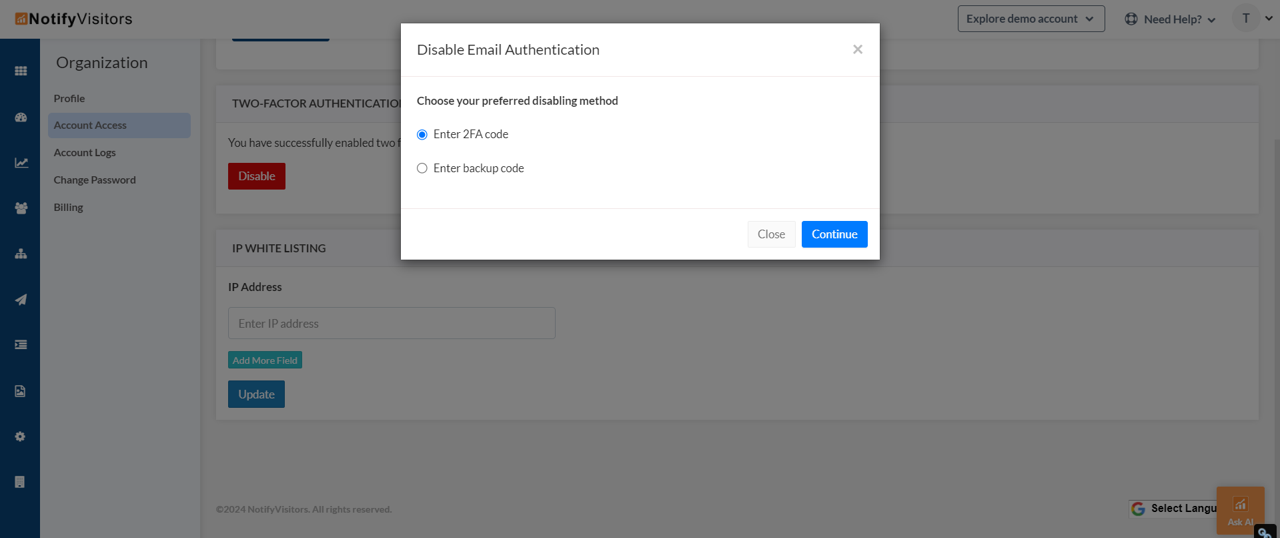
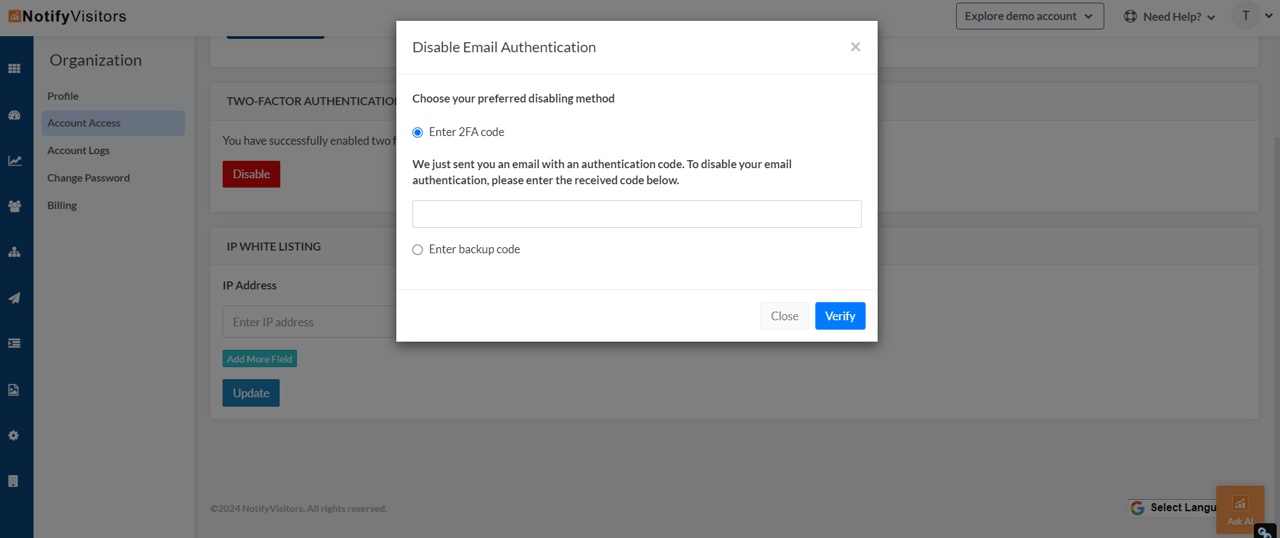
- Enter 2FA Code — If you select this method and click Continue, you'll need to input the one-time password (OTP) sent to your email. After entering the OTP, click Verify, and two-factor authentication will be turned off for your account.
- Enter backup code — If you select this method and click Continue, you'll be prompted to enter the backup code you received during setup. Input the code and click Verify, and two-factor authentication will be disabled for your account.
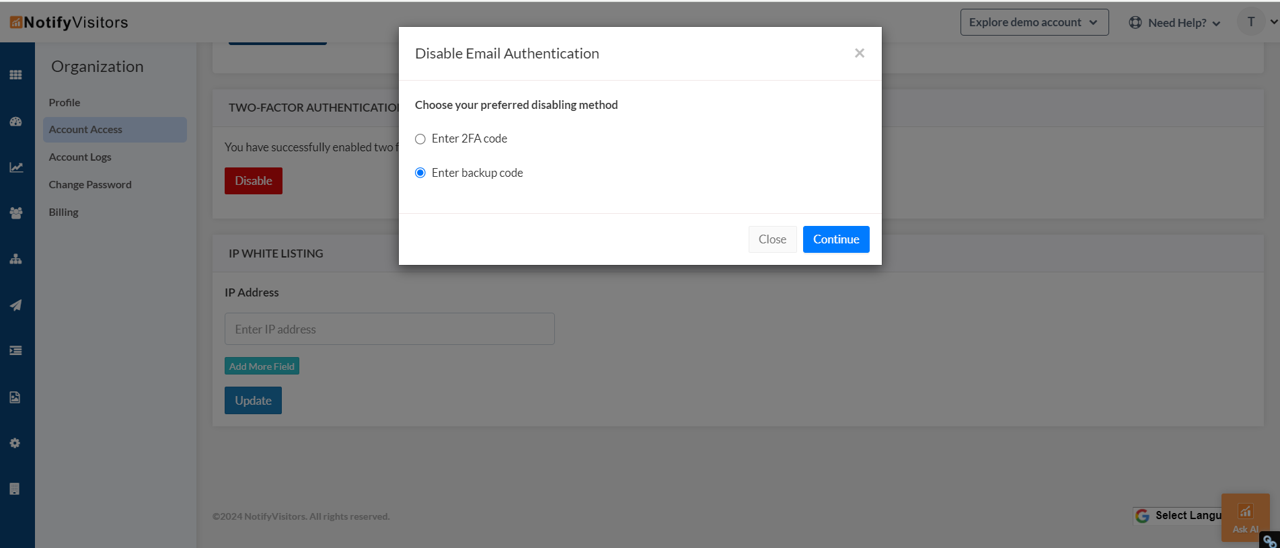
Note Just like when you enabled it, two-factor authentication can only be disabled from the admin account.
IP Whitelisting
While 2FA verifies who is signing in, IP Whitelisting controls where they can sign in from. By adding your trusted IP addresses to the whitelist, you limit account access to those approved networks — for example, your office network or a corporate VPN. This adds a strong, location-based layer of protection on top of your password and 2FA.
Add IP addresses to the whitelist
- Navigate to the Organization section of your NVECTA dashboard.
- In the left panel, select IP White Listing.
- In the IP Addresses field, type a trusted IP address into the "Enter IP address" box.
- To add more than one address, click the plus (+) icon beside the field and enter the next IP address. Repeat for each network you want to allow.
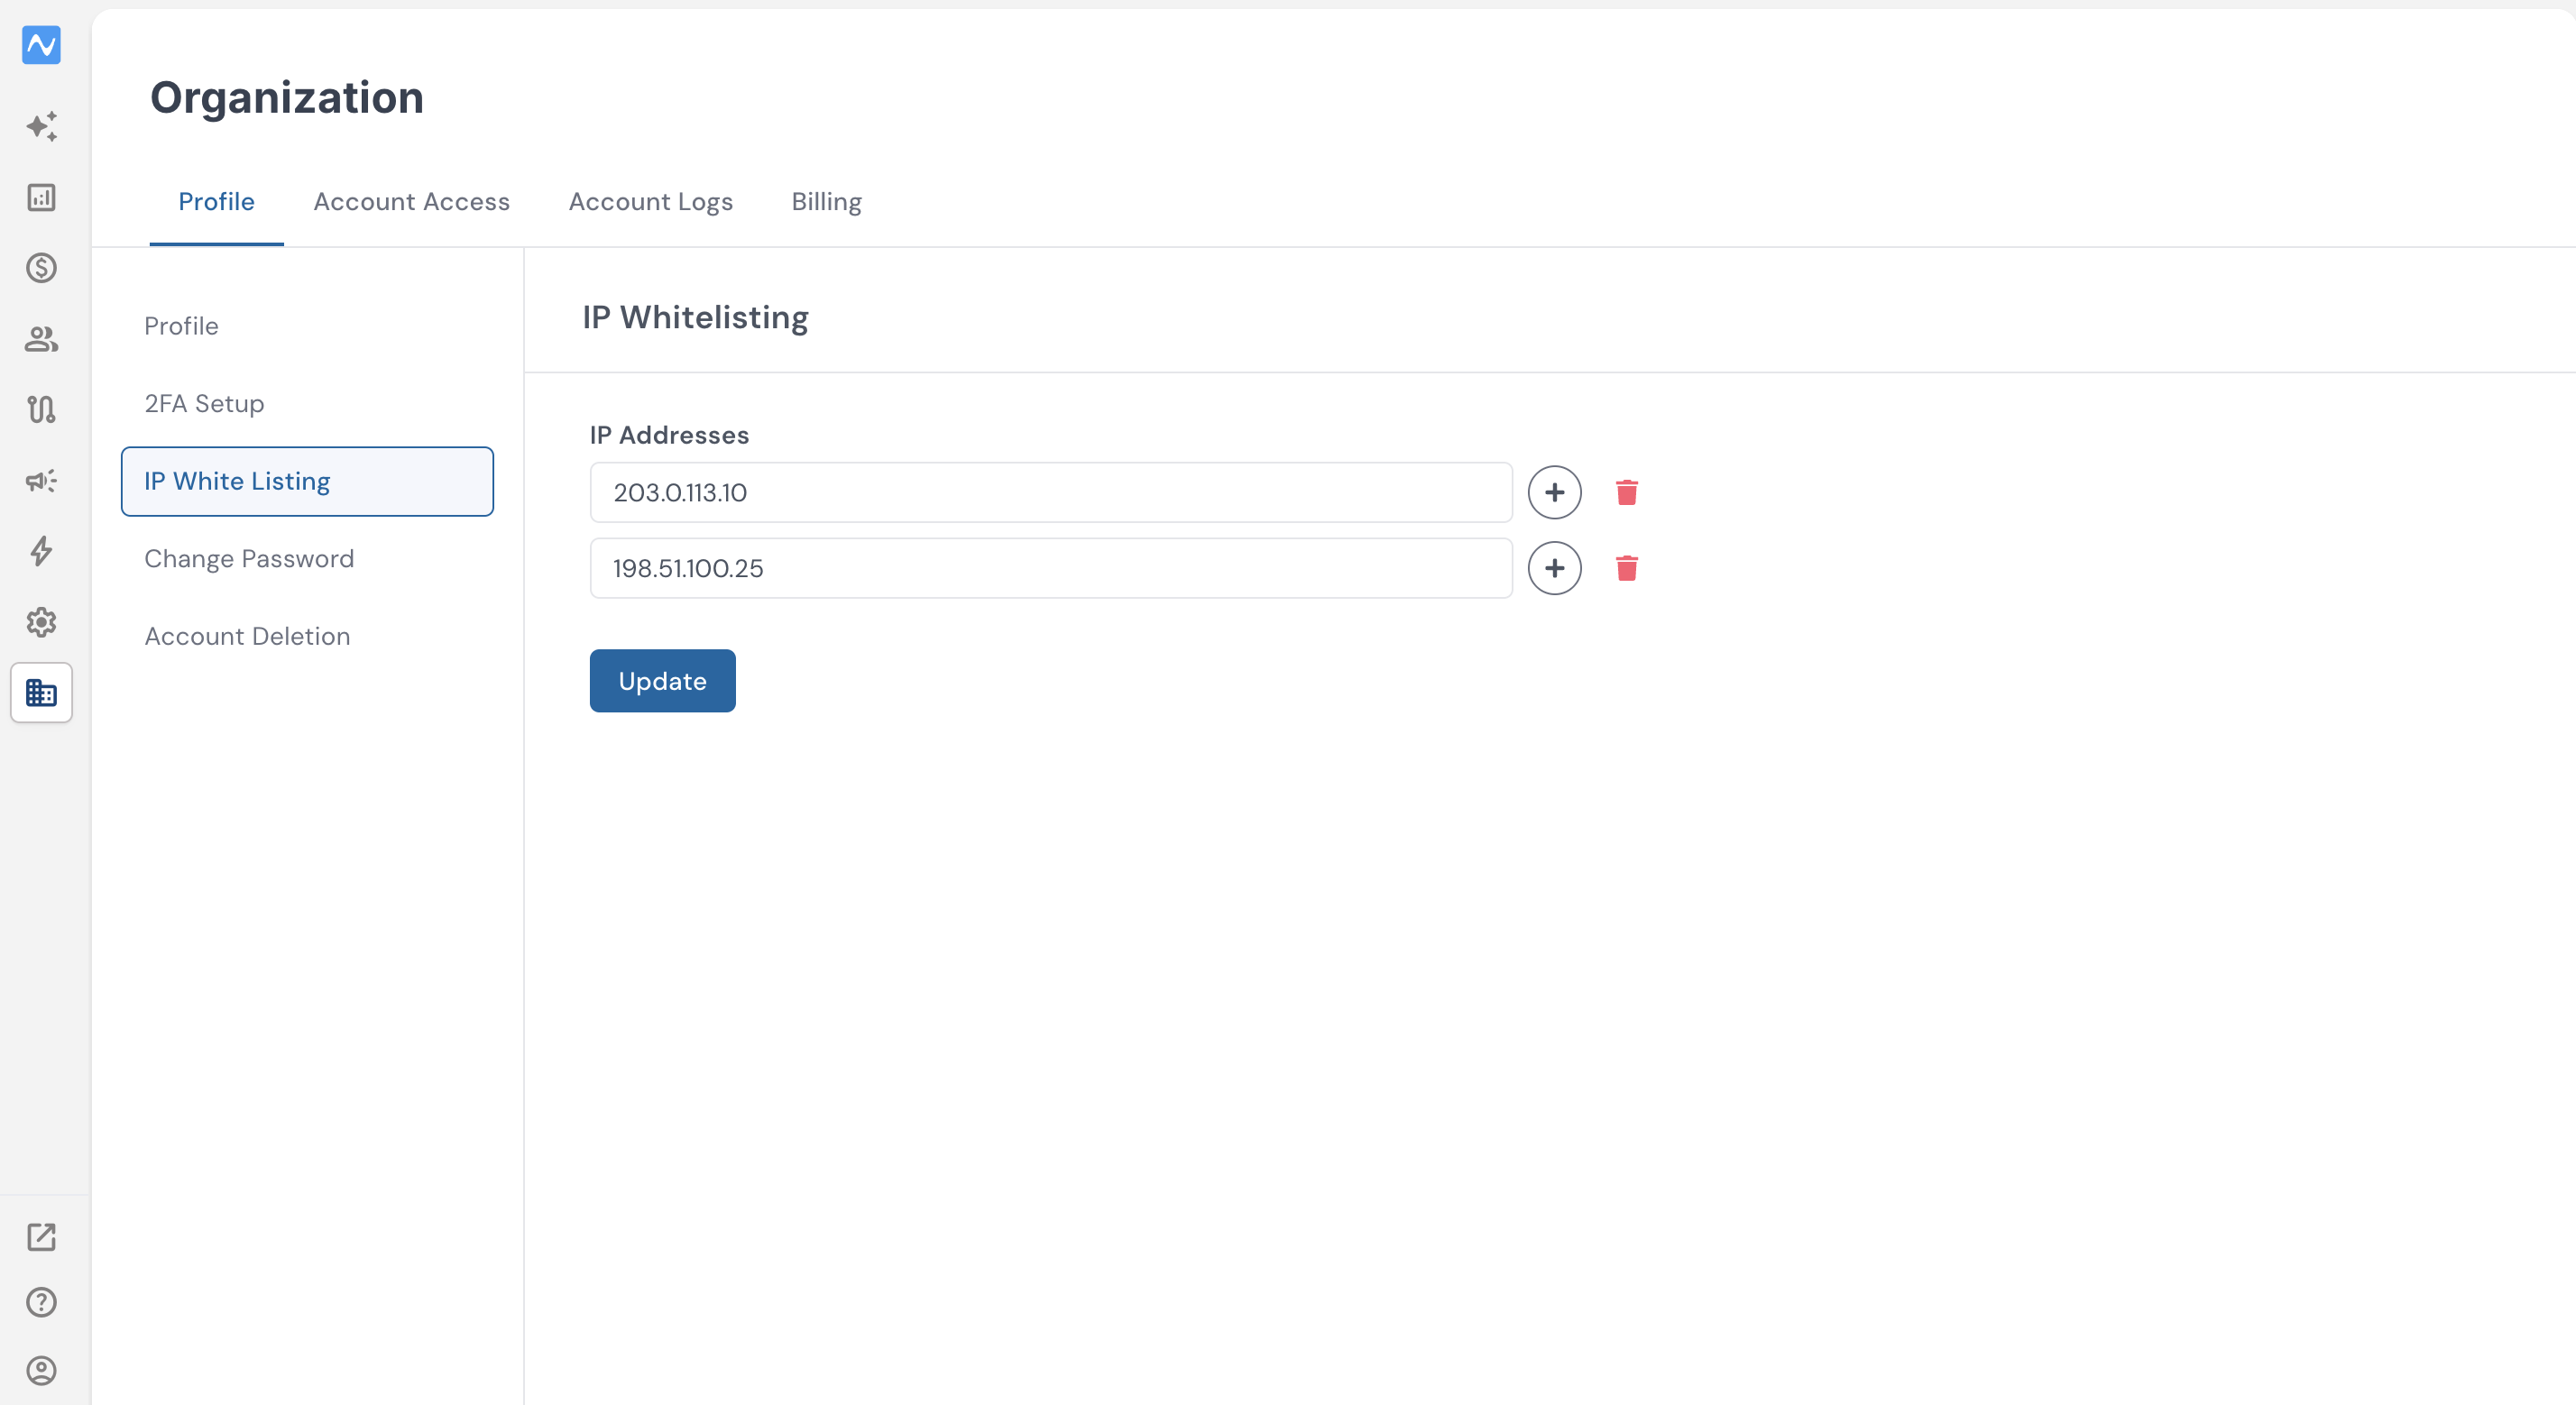
- Once you've added all your trusted IP addresses, click Update to save and apply the whitelist.
That's it — your account access is now limited to the IP addresses on the list.
Important — avoid locking yourself out Make sure your own current IP address is included in the list before you click Update.
Update or remove IP addresses
To change your whitelist later, return to Organization > IP White Listing, add, update, or delete IP addresses as needed, and click Update again to apply your changes.
Conclusion
Together, Two-Factor Authentication and IP Whitelisting give your NVECTA account layered, proactive protection. 2FA confirms the identity of whoever is logging in, while IP Whitelisting confines that access to the networks you trust. Used individually or together, these features significantly heighten protection against unauthorized access attempts and help fortify your account against potential breaches — strengthening security while giving you peace of mind.
Was this article helpful?
That’s Great!
Thank you for your feedback
Sorry! We couldn't be helpful
Thank you for your feedback
Feedback sent
We appreciate your effort and will try to fix the article