A Query Based Segment is a group of users that NVECTA builds directly from the models on your warehouse. You set rules on your user model, such as the city a user lives in, and on your event models, such as how often a user opened the app in the last 30 days. NVECTA finds the users who match, and you can target them in your campaigns.
If you are new to sources and models, start with Introduction to Composable CDP.
Before you begin
- A source: Your warehouse is connected to NVECTA. See Setting up sources and models.
- A user model: A model of your user master table, with Table Type set to User table.
- Event models, if you want to use activity: A model for each event table, with Table Type set to Event Table and your user model as its reference model.
The examples in this article use the users and events tables from How user and event models connect. The users table has one row per user with userid, email, mobile and city. The events table has one row per action with userid, event_name and event_time.
How a Query Based Segment works
A segment is made of one or more rules. Each rule picks one model and filters on it:
- Rule on a user model: Keeps users whose profile matches, for example city equals Mumbai.
- Rule on an event model: Keeps users who performed matching events in a time window, a set number of times, for example app_opened at least 3 times in the last 30 days.
- Is in segment rule: Keeps or removes users who are in a segment you already have.
Group Conditions then decides whether a user has to match one rule or every rule.
Step 1: Start a Query Based Segment
Where: Segments > Segments > Create segment
- Under Custom list segments, select Query Based Segment.
- In Select Source, choose the source that holds your models.
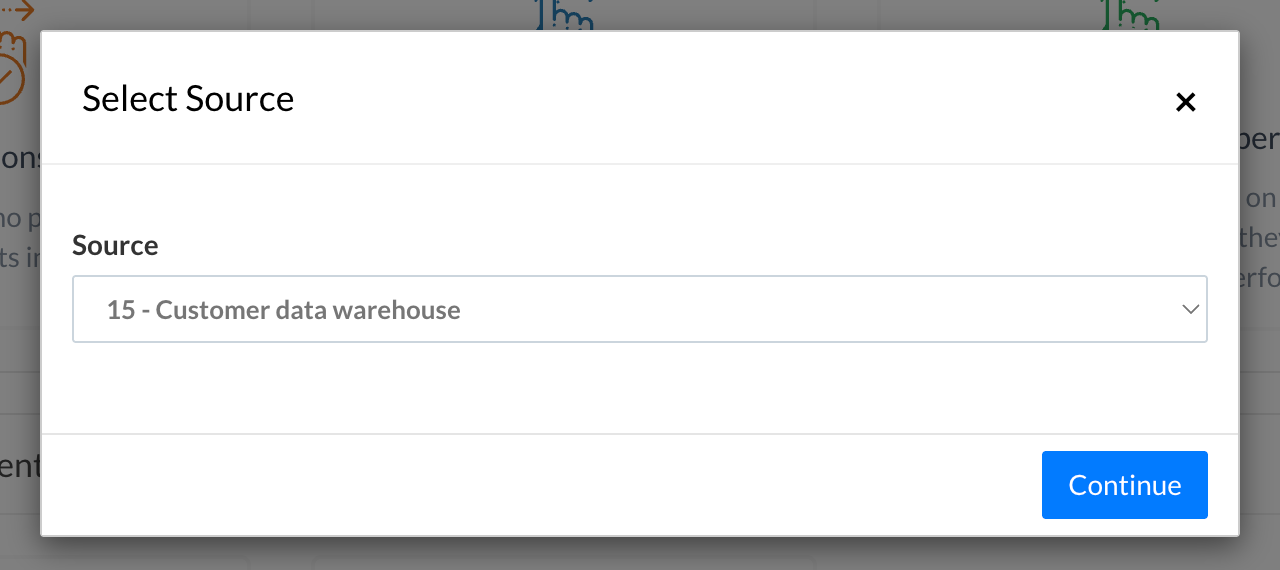
- Click Continue. The segment builder opens.
Step 2: Choose how rules combine
Under Group Conditions, choose one:
- Any rule can satisfy: A user joins the segment if they match at least one rule.
- All rules must satisfy: A user joins the segment only if they match every rule.
You can change this at any time before you save.
Step 3: Add rules
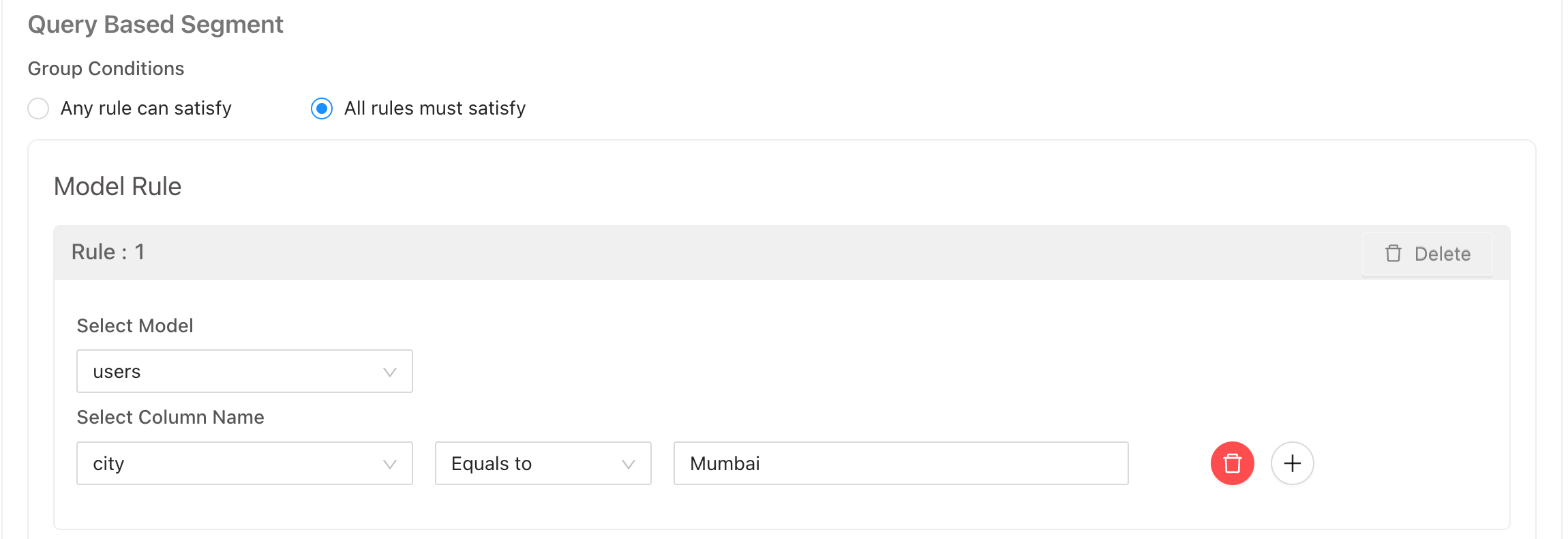
Each rule appears under Model Rule as Rule : 1, Rule : 2 and so on. Click + Add Rules to add another rule, and Delete to remove one.
Filter on a user model
- In Select Model, choose your user model. The list groups models under User Table and Event Table.
- Click + Add Attributes.
- Under Select Column Name, choose a column, then a condition and a value. For example, city, Equals to, Mumbai.
- To add another condition on the same model, click the + button next to it. Conditions in one rule are joined with And, so a user must match all of them.
Filter on an event model
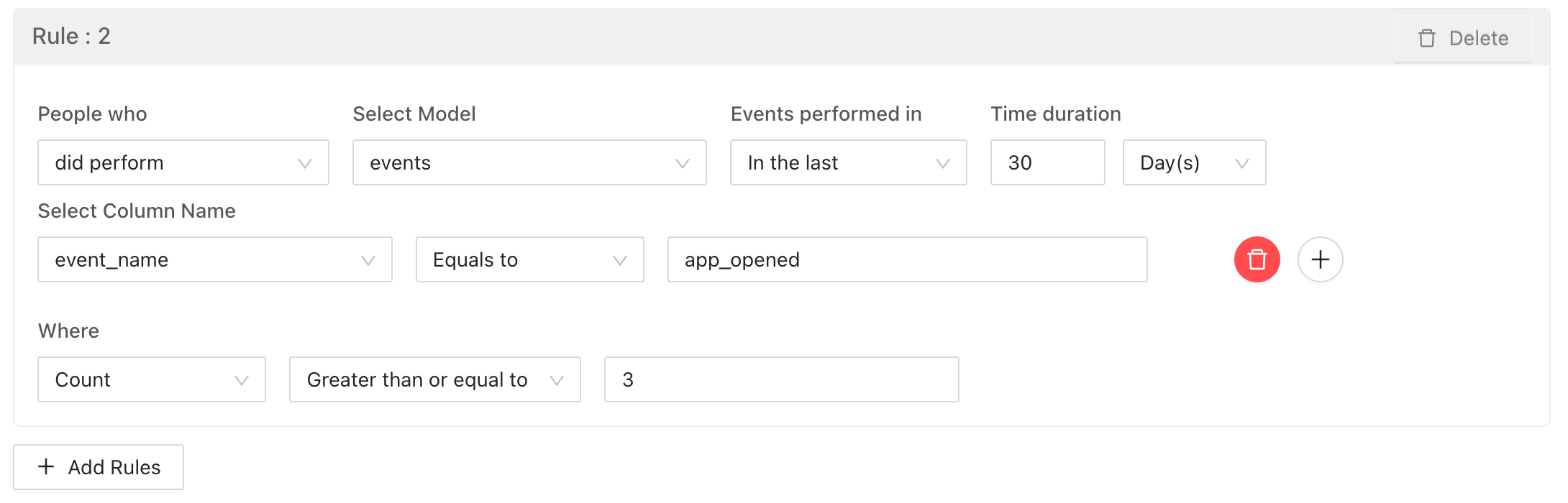
- Set People who to did perform. did not perform is listed but cannot be selected yet. To find users who did not perform an event, first publish a segment of the users who did. Then, in a new segment, add a rule on your user model for the audience you want and an Is in segment rule that excludes the first segment, and choose All rules must satisfy.
- In Select Model, choose your event model.
- Under Events performed in, choose when the events happened, then fill in the date or the Time duration in Hour(s) or Day(s). The options are static date, Today, Yesterday, On, In the last, In the last - Range and Was exactly.
- Optional: click + Add Attributes to count only some events, for example event_name, Equals to, app_opened. Without an attribute, every row in the event model counts.
- Under Where, set how often or how much:
- Count: The number of matching events. Choose Less than or equal to, Greater than or equal to, Equal to or In between, and enter the number.
- Aggregation: A calculation on a number column of the matching events. Choose Sum of property, Average of property, Minimum of property, Maximum of property, Median of property or Distinct count of property, then the column. Only number columns are listed. Then choose Less than or equal to, Greater than or equal to, Equal to or In between, and enter the value.
Include or exclude another segment
- Set People who to Is in segment.
- In Segment Type, choose Include to keep the users of that segment, or Exclude to remove them.
- In Select Segment, search for the segment by its ID or name and select it.
Use this to reuse an audience you already built, for example to exclude users in a "Recent purchasers" segment.
Conditions you can use
The conditions offered under + Add Attributes depend on the column's data type in the model's mapping.
| Column type | Conditions |
|---|---|
| Text | Include, Exclude, Contains, Not Contains, Equals to, Is Exist |
| Number | Less than, Greater than, Range, Equals to, Is Exist |
| Date | A date range, picked with Start date and End date. |
Is Exist takes Yes, for users who have a value in the column, or No, for users who do not.
If a column shows the wrong conditions, check its Data Type in the model's Mapping step. See Setting up sources and models, Step 4: Mapping.
Step 4: Preview the segment
Click Preview to check the segment before you save it. The Segment preview panel shows:
- Total users: How many users match your rules right now.
- User list: Each matching user's Name, User ID and NV UID. Use Search by NV UID to check whether a specific user is in the segment.
- View Definition: Your rules written out in plain words.
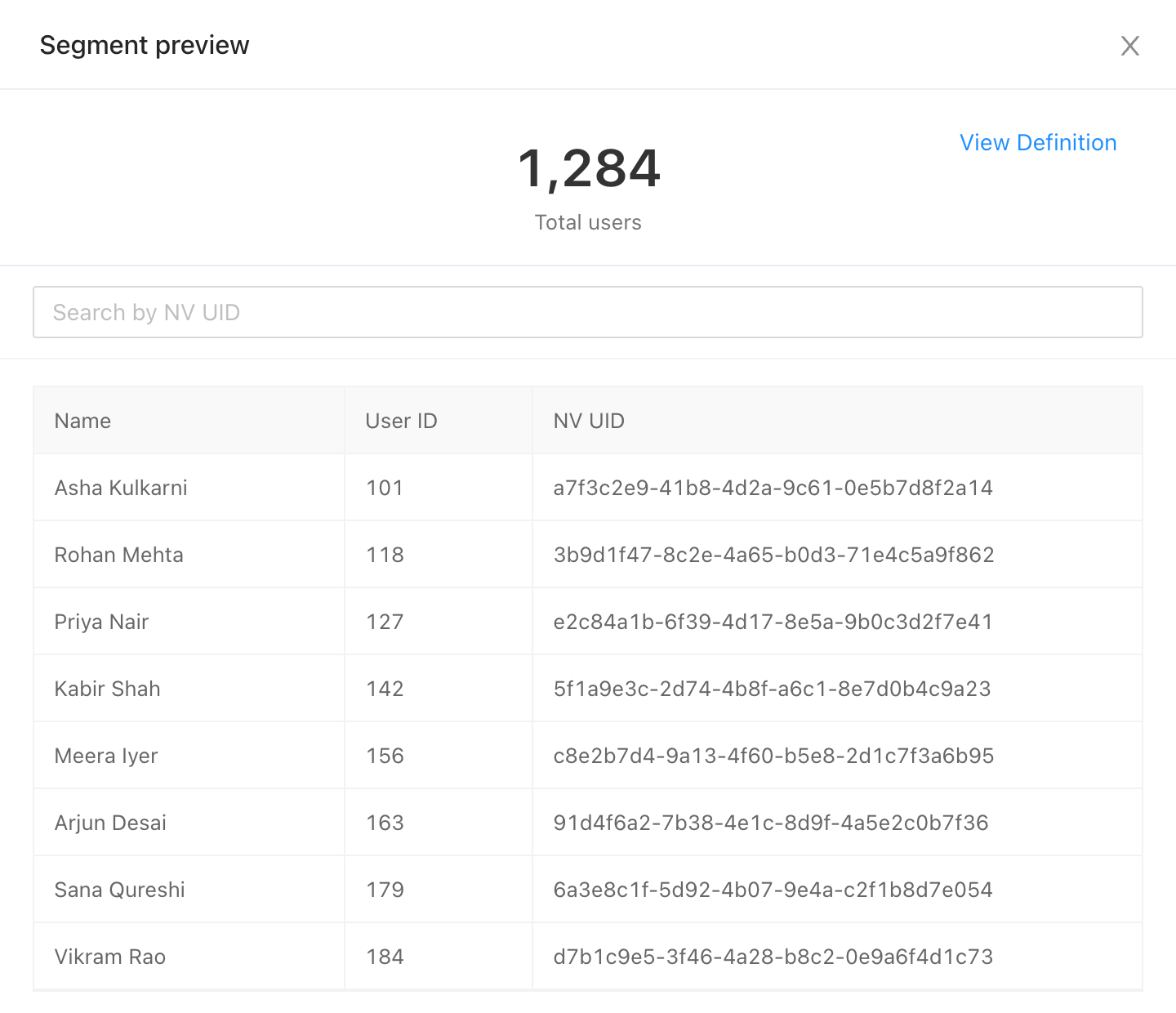
If the count is 0 or looks wrong, check the time window under Events performed in, the values in your conditions and the Group Conditions setting.
Step 5: Keep the segment up to date
Select Precomputed to keep the segment updated automatically as your warehouse data changes:
- Popups and signup forms: The segment is updated every 24 hours.
- Email, SMS and push broadcast campaigns: The segment is updated just before the campaign is sent.
Without Precomputed, NVECTA calculates the segment when you publish it. To recalculate it later, click Update in the segment’s Actions menu.
Step 6: Save and publish
- Click Create.
- In Segment Configurations, enter a Segment Name, for example "Mumbai active app users", and optionally choose a label in Choose Label.
- Click Save. The segment is saved as a draft. Once you change the name, this button is labelled Update.
- Click Publish Segment to make it available in your campaigns.
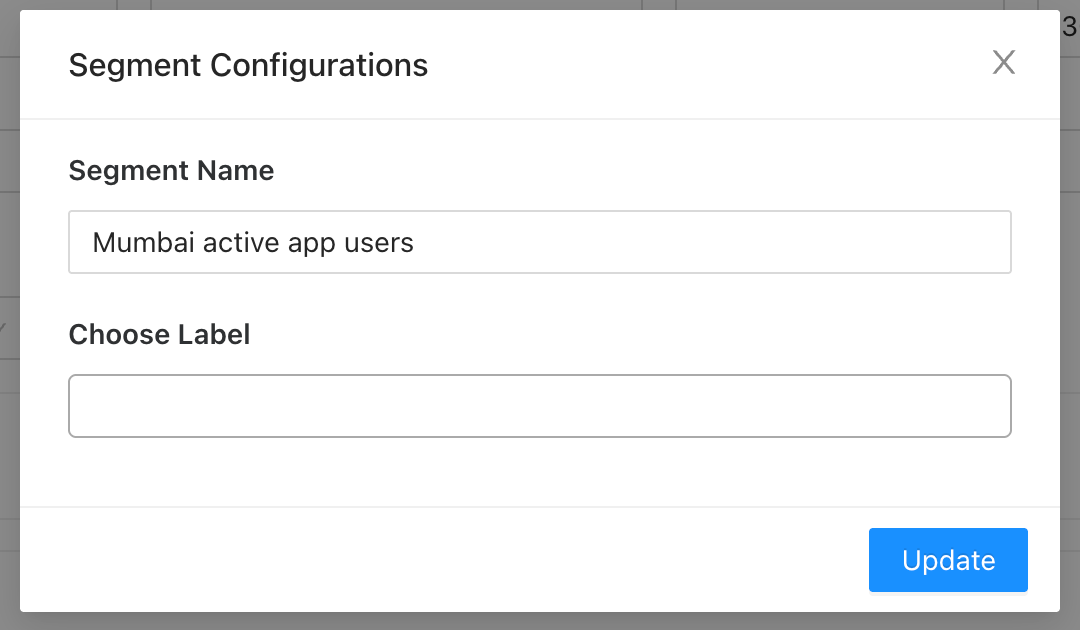
You can only edit a segment while it is a draft. Once it is published, its rules are locked so that campaigns using it stay consistent. To change a published segment, duplicate it and edit the copy.
Example: active app users in Mumbai
Suppose you want to send an offer to users in Mumbai who opened your app at least 3 times in the last 30 days. Using the users and events models:
- Under Group Conditions, select All rules must satisfy, because users must match both rules.
- Rule : 1: In Select Model, choose the users model. Add the attribute city, Equals to, Mumbai.
- Rule : 2: Set People who to did perform and choose the events model. Set Events performed in to In the last, 30 Day(s). Add the attribute event_name, Equals to, app_opened. Under Where, choose Count, Greater than or equal to, 3.
- Click Preview, then Create and Publish Segment.
NVECTA links each event to its user through userid, so the segment contains users from the users table, with the email and mobile that your campaigns need.
Manage your segments
Every segment appears in the list under Segments > Segments, with its Status (Draft, Published or Error) and Users Count. To see only Query Based Segments, set Segment type to Query Based Segment.
Click the ... button in the Actions column for more options:
- Draft segments: Edit, Duplicate, Delete and Check Dependency.
- Published segments: Analytics, Campaigns, User Logs, Duplicate, Delete, Check Dependency and Update.
Use Check Dependency before you delete a segment, to see whether a campaign or another segment uses it.
Frequently asked questions
Is my warehouse data copied into NVECTA?
Can one segment use both a user model and an event model?
Why does my event model not appear in Select Model?
Why can't I edit my segment?
What does the Error status mean?
Can I export a Query Based Segment to S3?
What's next
Use your segment as the audience of a campaign, or analyse your model events in Insights. See Analytics with Composable CDP.
Was this article helpful?
That’s Great!
Thank you for your feedback
Sorry! We couldn't be helpful
Thank you for your feedback
Feedback sent
We appreciate your effort and will try to fix the article